Portfolio Categories: KMART

Guide to Open-Ended Toys

When it comes to purchasing toys for kids, consider the quality and kind of play children will experience. Creative toys that offer open-ended and endless possibilities are often the best choice.

What Are Open-Ended Toys?

Open-ended toys allow children to direct the play as they choose. Such toys don’t feature a set way in which they should be used. For instance, they generally don’t feature a cause and effect, such as toys that talk when you press a button. Open-ended toys allow for interpretation and experimentation.

Benefits of Open-Ended Toys

Creative toys that allow children to experiment and try their own ideas out for activities foster positive behaviors such as exploration and ingenuity. Open-ended toys encourage imaginative play, which teaches children to think for themselves and to become resourceful. The more thinking a toy requires, the better the toy is for the child. Open-ended toys tend to also cause a child to develop various skills, including fine-motor and thinking skills and language development.

Open-Ended Toy Suggestions

Generally, simpler toys offer open-ended play opportunities. Toys that have stood the test of time are often open-ended toys. These include:

  • Building blocks. The classic building block offers hours of open-ended play opportunities. Blocks that come in different shapes and sizes will keep kids occupied and developing many skills, including visual-spatial skills and problem solving. Get children wooden, plastic or even foam blocks.
  • Sandbox. The sandbox offers children the space to create and let their imaginations soar. A wide variety of sandbox options exist, including ones that provide shelter from the sun. Sandbox ideas for little tykes include encouraging them to make a castle or a giant super highway with cars and trucks.
  • Arts and crafts. Give a little one an art set, and the sky is the limit as to what can be created. With paper, paints and glitter, a child can make masterpieces that are totally unique each and every time. Ideal art supplies include finger paints, nontoxic sculpting clay and washable markers.

When’s the Best Time to Water Your Lawn and For How Long?

A well-hydrated lawn looks healthy and lush. Knowing when is the best time to water your lawn and for how long takes keeping a few pointers in mind.

Testing for water readiness

Performing daily irrigation on turf grass is often not necessary, especially during cooler weather. The secret to how to grow grass that is healthy is to test for water readiness prior to watering. Only watering when the turf is dry and actually requires it creates a stronger root system and longer-lived, healthier grass. Several methods work well for checking to see if your lawn requires watering. They are:

  • Test the grass by walking on it. If the turf springs back quickly, it doesn’t require irrigation. If your footprint remains for several minutes, it’s time to water.
  • Examine the color of the turf. Grass that has a blue-gray tinge requires water.
  • Insert a finger, trowel or moisture meter into the soil, and check the top 6 inches. If it is dry, it’s time to water.

Know the best time to water lawn

Water during periods of the day when evaporation is less likely. This means irrigating in the early morning hours or at night. Respond to the changing seasons by resetting your sprinklers accordingly when the length of day changes.

Set up multiple watering cycles

Avoid waste by preventing water runoff. If you experience excess water flooding the street, shorten the watering cycle and create more of them. For instance, set up to water three times at one-hour intervals, which allows time for the water to sink in before watering again. Your goal is achieving deep soil penetration, which will lead to stronger, healthier grass.

Check your irrigation system

Watering systems require regular inspection to ensure that they are working properly. Few things will kill your grass faster than broken sprinkler heads during the hot days of summer. Check to see that the sprinklers offer head-to-head coverage and completely saturate the lawn. Also consider using low-flow sprinkler heads, which help prevent runoff. And if you don’t have a programmable sprinkler system, consider installing one to make your irrigation chores easier.

When Is the Best Time to Prune?

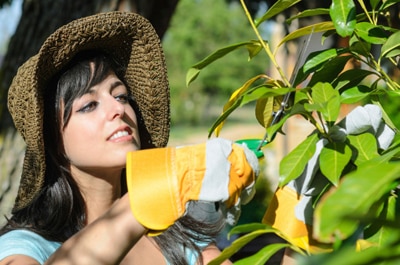
One of the keys to a healthy, attractive garden is regular pruning. Trimming your plants keeps them shapely and initiates new growth and blooming. Consider the following factors when determining when to prune.

Time of year

Certain plants require pruning at specific times of the year. For instance, hydrangeas bloom on wood that grew the previous year. That means if you want flowers, it’s important to only prune the plant immediately after flowering. If you prune at any other time of year, you risk removing buds. If you live in a cold climate, heat-loving summer bloomers like hibiscus should be pruned no later than mid- to late summer. Pruning initiates growth, so if you prune hibiscus too late, it will put on new foliage that could be damaged by frost. This damaged growth can result in no blooms come spring.

Periods of blooming

Generally, good times to prune are following periods of flowering and rapid growth. If the plant blooms more than once a year, pruning will often initiate it to re-bloom. Pruning right after flowering is also safest for those plants that only bud up once a year, because doing so helps guarantee that you don’t accidentally prune off latent buds.

Harvest

Giving many vegetable plants a minor pruning following harvest cleans things up and often initiates regrowth and blooming. Slightly prune back vining veggie plants like tomatoes, beans and cucumbers, and within a couple of weeks, you will often enjoy another flush of blooms. Only prune veggie plants back by 10 percent to 15 percent at a time. And avoid doing so toward the end of the season, as the plant may not have enough time to re-grow before frost sets in.

Dormancy

Most fruit trees and berry plants require pruning while dormant. Without this pruning, they will often experience a poor or even nonexistent fruit crop. Pruning fruit trees also helps direct growth. Dormant pruning applies to grapes; stone fruits such as peaches and plums; and berries, like raspberries, blackberries and boysenberries.

Following rapid growth

It’s often an ideal time to trim back after a period of rampant growth. Doing so keeps quick growers, like certain invasive vines, under control.

Bountiful Container Vegetable Gardens

If you want a vegetable garden but lack ground space, try container gardening. Growing in containers lets you enjoy plenty of homegrown veggies. For a prolific potted produce harvest, keep the following growing tips in mind.

Ideal veggies for container growing

You can grow just about any type of produce in containers. Good choices include garden beans, peas, tomatoes, peppers, cucumbers, eggplant, strawberries, lettuces, Swiss chard, spinach and herbs, such as rosemary, thyme, marjoram, oregano, lavender, basil, parsley and chives. Root vegetables also do well, including carrots, beets, potatoes, radishes and parsnips. When choosing your vegetables for container growing, pick varieties with smaller fruits. For instance, opt for cherry and small tomatoes, pickling cucumbers and dwarf carrots and beets.

Choose the ideal container

Just about any container will work well, as long as it has adequate room for soil and drainage holes. Choose from wooden planters, plastic pots, glazed ceramic and terra-cotta. If you live in a dry, hot climate that receives little rainfall, opt for plastic, glazed ceramic or wooden containers, rather than terra-cotta, as that material dries out quickly. For large plants like tomatoes and potatoes, use at least a 10-gallon container. Anything smaller will result in the plant declining before its time from lack of adequate root room. Plant smaller veggie plants, such as leafy greens, strawberries and root veggies, in a 3- to 5-gallon container. Use a high-quality potting soil to plant—never use soil from the garden, as it is too heavy for containers and won’t result in healthy crops.

Indoor container garden

Growing vegetables indoors is possible, provided you have sufficient light. Place plants in an eastern or southern window, or use full-spectrum lighting. Keep your plants as close to the light source as possible so that they receive adequate light for growth and veggie production.

Container-grown veggie maintenance

  • Water well. Container-grown veggies require much more water than their in-ground counterparts. When the temperatures are high, some pots require daily watering. Soak the pot well, letting water rush from the bottom of the container.


  • Fertilize regularly. Potted veggies are heavy feeders. Add a slow-release fertilizer when planting, and feed plants every two weeks with an organic fertilizer designed for vegetables.


  • Harvest often. Keep your veggie plants producing by harvesting them frequently. Pick produce when it is still young and tender and before it becomes unwieldy, at which point it could cause the pot to become top-heavy and fall over.

Drought-Tolerant Landscaping

Growing drought-tolerant annuals and other low-water plants offers a wide variety of benefits. Such plants allow you to save water, which can be especially helpful in areas hit by drought. Many plants that possess drought resistance, like certain shrubs, also tend to be low maintenance.

What is drought tolerance?

Drought tolerance indicates that a plant is able to withstand periods of drought and can survive on low amounts of water overall. It does not mean that the plant can survive on no water. It’s important to remember that because of their access to limited amounts of soil, drought-tolerant plants in containers require more water than their in-ground counterparts.

Common drought-tolerant annuals

A wide variety of drought-resistant annuals exist. Some easy-to-grow favorites include ageratum, blanket flower (Gaillardia), cockscomb (Celosia cristata), cosmos, dusty miller (Senecio cineraria), flowering tobacco (Nicotiana alata), marigold, moss rose (portulaca grandiflora), salvia, verbena and zinnia.

Drought-resistance shrubs and vines

Growing foundation plants that are tolerant of dry conditions gives you the opportunity to enjoy a low-maintenance landscape. Drought-resistant shrubs to grow include panicle hydrangea (Hydrangea paniculata), flowering quince (Chaenomeles speciosa), glossy abelia, maple-leaf viburnum (Viburnum acerifolium) and American beautyberry (Callicarpa americana). Vines that stand up to little to no watering include bougainvillea, bower vine, morning glory and passion vine.

Growing tips for drought-tolerant plants

Locate drought-tolerant plants in a sunny location in well-draining soil. If necessary, improve drainage by adding compost, which will also help the soil retain moisture. Mulch drought-resistant plants by covering the area surrounding the plant with a 2-inch layer of shredded bark. Water your drought-tolerant annuals and shrubs regularly for the first few weeks after planting. They don’t actually become drought-tolerant and able to go without water for extended periods of time until they’ve established themselves, so this early watering is important to their survival. Once they’ve put on 25 percent new growth, slowly ease off on watering until you are only irrigating weekly for annuals and monthly for vines and shrubs, when there is no rainfall. Water deeply when you irrigate, which creates a deep root system that is better able to withstand dry periods.

Grill and Pickle Summer Veggies

One of the highlights of the summer season is grilling and pickling summer veggies. A wide variety of methods exist for preparing and preserving your summer harvest. Try these preservation and grill methods to add some great flavor to your summer meals!

Grilled vegetables made easy

Barbecue recipes for veggies call for oiling your produce prior to grilling. Either spray with a light coating of cooking oil or toss in a bowl with a little bit of oil. Avoid adding too much, as dripping oil causes excess flames which can burn your veggies. After coating the veggies in oil, sprinkle with your favorite seasonings. Make the grilling process easier by either skewering your produce or placing them in a grill basket. You can cut your veggies large enough so that they won’t slip through the basket or barbecue grate, or place your produce in aluminum foil packets and grill in this manner. Spray the interior of your packets with cooking oil and fill with dense veggies, like sweet potatoes, regular potatoes and parsnips. For crispy veggies, cut thin slices; for meatier produce, make big, chunky cuts.

Produce that grills well

Veggies and fruits that do well when grilled and taste terrific include squash, pineapple, cherry tomatoes, onion, green beans, sweet peppers, asparagus, eggplant, corn, okra and potatoes.

Pickling summer veggies

Another way to preserve your summer produce is to pickle it. Pickling allows you to extend the enjoyment of your produce for a few extra weeks. Good produce for pickling includes cucumbers, beets, carrots, artichokes, green beans, cabbage, Brussels sprouts, ginger, okra, peppers, tomatoes and peaches. To pickle your produce, prepare by washing and drying well. Then chop or dice, depending on the veggies and the desired shape you want. Beets and carrots often work well in rounds, whereas cucumbers are best cut into spears. Place your veggies into mason jars, filling each one three-quarters of the way full. Next, add herbs and spices, such as dill for cucumbers. Then make your brine, which is a mixture of vinegar, water and sugar:

  • To make 6 cups of salty brine, boil for two minutes in a large saucepan: 3 cups distilled white or cider vinegar, 3 cups of water, 2 tablespoons plus 2 teaspoons sea salt and 2 tablespoons sugar.
  • To make 6 cups of sweet brine, boil for two minutes in a large saucepan: 3 cups distilled white or cider vinegar, 3 cups of water, 1 1/2 cups of sugar and 1 tablespoon plus 1 teaspoon sea salt.

Add your brine to the veggies, filling your jar up to a half inch from the brim and covering all of the veggies. Lid the jar and refrigerate for a minimum of 24 hours before serving. Veggies pickled in this manner can be kept for up to a month in the refrigerator.

Creating a Hummingbird Garden

Attract hummingbirds to your garden and enjoy watching the energetic birds flit from one flower to another. Get close, and you can even hear the unmistakable whir of their wings. Creating a hummingbird garden requires incorporating a variety of elements, including flowers that hummingbirds feed on, a source of water and nesting sites.

What plants do hummingbirds like?

Hummingbirds have a high metabolism and eat twice their body weight in nectar and insects daily. This means that if you know what plants hummingbirds like, you’ll be able to provide a menu that attracts them. The hummingbird’s favorite flowers are red and tubular, although they also sip from other brightly colored flowers. Good choices include trumpet vine, cardinal flower, various salvias, bee balm, honeysuckle, fuchsia, penstemon, columbine, impatiens, cleome, hibiscus, hollyhock, buddleia, lupine, petunia, flowering tobacco, coral bells, larkspur and foxglove.

Space out hummingbird plants

When planting, leave room between flowers that hummingbirds feed on. The tiny birds hover while feeding and require sufficient room to do so.

Hang hummingbird feeders

Considering the fact that hummingbirds must feed almost continuously, it also helps to hang hummingbird feeders in your garden. Keep the feeders filled with a clean solution of one part sugar to four parts water.

Add water

Hummingbirds gravitate to running, shallow water sources. A flowing fountain or recirculating birdbath gives the hummingbird a chance to hover and sip from the water, as well as bathe. Keep the water clean and locate the fountain or birdbath out in the open. This allows you to get a good view of the hummingbirds. Birds in general won’t visit water sources near dense vegetation, as it could harbor predators.

Provide shelter and nesting sites

Keep hummingbirds in your garden by giving them a place to obtain shelter and nest. The birds gravitate toward a variety of trees, including bottlebrush, willow, eucalyptus and ash. Trees offer locations for bird’s nests, as well as nesting materials.

Leave dead wood

Hummingbirds prefer to perch on dead limbs rather than living ones. When such wood decomposes, it also attracts a variety of insects, which hummingbirds dine on, particularly when they are nesting.

Planting Fall-Blooming Plants

Hang on to summer in the garden as long as possible by growing fall-blooming plants. When you know the right fall plants to grow, you can enjoy a bounty of blooms in the landscape well into autumn.

Late-summer flower selections

A wide variety of plants bud up and decorate the garden in the fall months. Good late-summer flower choices that take center stage include aster, mum, coral vine, angel’s trumpet (brugmansia), helianthus (perennial sunflower), sedum, coreopsis, joe-pye weed, helenium (sneezeweed), mallow, false dragonhead, coneflower (Echinacea), rudbeckia, yarrow, salvia, toad lily, daylily, globe thistle, wine cups and goldenrod. Fall-blooming beauties tend to have flowers in rich autumn jewel-tone hues, such as rust, gold, scarlet and deep purple. These colors give you the opportunity to use the plants for your fall decorating schemes.

When to plant fall-blooming flowers

For an eye-catching late summer and fall bloom, plant late-blooming flowers at the beginning of August. This will give the plants a chance to set down strong roots and bud up by early September. If you want to grow fall-blooming flowers by seed, plant the seeds by early July. Make sure to keep the seeds and seedlings moist in the hot weather.

Planting fall-blooming plants in the garden

Plant fall bloomers in a full-sun location with rich, well-drained soil. Often the locations where your spring- and summer-flowering plants are growing well also work for your fall bloomers. If there are still summer flowers in bloom in the planting bed, put the fall bloomers next to them and then pull up the summer flowers once they stop blooming so that the fall bloomers can completely take over the bed. Fall-blooming flowers also do well when planted in containers. Use a high-quality potting soil.

Late-summer flower maintenance

If there is no fall rainfall, keep the flower bed moist but not soggy. Feed fall-flowering plants once with a fertilizer designed for blooms when you plant and then a second time in September. Deadhead with pruners on a regular basis to keep the plants producing flowers as long as possible.

Water Gardening

Whether it’s gurgling, bubbling, splashing or flowing, water in the garden casts a magical spell over the landscape that draws you outdoors. Understanding what a water garden is helps you to establish one in your own yard.

What is a water garden?

Water gardens can be located in large fountains and containers or ponds. Such water features also often contain a waterfall effect. Though they may contain fish, the main focus of water gardens are the plants. It’s possible to enjoy your own DIY water garden if you follow these tips.

Choose the ideal location

Seek an area in the yard that is bright but cool. Most plants that flower need a minimum of five hours of direct sunlight a day. Avoid a location with full sun all day, though, as such an area will be too hot and sunny to enjoy. Excessive sun also creates algae in your pond.

Decide on desired pond dimensions

If you decide to build your own pond, for the best results it should be at least 18 inches deep and covered with plants by 60 percent. Growing a lot of water plants provides shade on the water’s surface, which prevents the water from forming invasive algae.

Install a filter

The best water gardens have a filtration system that filters out sediment so that your water remains clear. Choose a system that is large enough for the volume of water you’ll be pumping. If necessary, get two filters.

Include a good mix of plants

Water garden plants consist of bog plants, which grow along the edge of the pond and can be submerged in water; oxygenators, which add oxygen to the water and floaters, which, as their name suggests, float on the water.

Add fish

Ideal fish for water gardens include mosquito fish, which eat mosquito, larvae and goldfish. Be careful not to overload the pond with fish, as this can cause a scarcity of food and cause the water to be cloudy.

Keep it clean

Water gardens that become overgrown and filled with plant debris look messy and unkempt. On a daily basis, scoop out leaves that have landed in the pond and cut back the plants every three weeks. Adding barley straw to the pond also helps keep it clean.

Beyond the Lawn: Other Landscaping Ideas

While an expansive green lawn is pleasing to the eye, it can also be monotonous. It is possible to go beyond turf and enjoy something different in your front and backyard garden. Consider incorporating some of these modern landscape ideas into your yard.

Go native

A landscape consisting of plants that are native to your area adds an attractive touch and is easy to care for and maintain. Such landscapes do triple duty, as they are a magnet for butterflies and birds seeking nectar and shelter, and they are extremely drought-tolerant. Consult with your local nursery or garden supply center regarding the best plants to include in your native landscape.

Plant a rose garden

As one of the most popular flowering plants, roses make an excellent alternative to the lawn when you are completing your DIY backyard landscaping ideas. Plant a rose garden in your front yard, and you’ll have everyone stopping to admire them, or plant a rose garden in your backyard where you can sit and admire the flowers. Choose between traditional hybrid tea roses, which grow upright and provide good cutting flowers, and low-growing ground cover types that are easy to grow and don’t require any pruning. Fertilize on a regular basis, and you’ll enjoy plenty of blooms.

Add a structure

Items like gazebos and trellises provide interest to the landscape and give you something on which to grow. Good vining plants for these structures include clematis, grape, wisteria, black-eyed Susan vine, passion vine, morning glory, mandevilla and cross vine.

Create a seating area

Give yourself a good view of the rest of your landscape by adding a seating area. A bench and side table to hold refreshments offers a place to chat with friends and family or read a favorite book.

Accessorize

Adding accessories to the garden, such as statuary, gazing balls, decorative birdhouses and even birdbaths, is an easy way to add interest. Accessories last from season to season and don’t have to be in bloom to look attractive. Just be careful when adding accessories to your landscape that you don’t overdo it. Too many accessories will confuse the eye and can overwhelm the landscape.

Harvesting Fruits and Veggies in the Summer

Since one of the reasons to grow your own produce is to harvest fruit and vegetables that are fresh and nutritious, it makes sense to pay close attention to your harvesting and storage methods. Follow these steps to preserve fruits and vegetables at home.

Harvest regularly

Timely, regular harvesting of homegrown produce is essential to guarantee that you pick fruit and veggies at their peak. Many items, such as tomatoes, strawberries and peaches, are at their best for a short period of time. Once fruits and veggies pass their prime, they start to rot. Stop this from happening by checking the garden daily for ripe produce. Harvesting regularly can also improve the yield of some crops, and not harvesting enough can cause a plant to stop producing.

Pick produce with care

Many homegrown produce items bruise easily, which leads to rotting, so it’s important to be gentle when harvesting. Pulling on fruits and veggies can damage the produce and the plant, so use pruners when harvesting. Bring along a basket into which you can gently set the fruit and veggies, and avoid leaving the basket in direct sunlight for more than a few minutes.

Choose a storing method

How you store your produce depends on the item. Some fruits and veggies should be stored at room temperature, such as tomatoes and watermelons, while other produce items like potatoes can be stored in a cellar. Retain the integrity of many fruits and vegetables by putting them in the refrigerator. These includes apples, corn, radishes, grapes and strawberries. When storing produce in the refrigerator, it is best to put it in the crisper, which is generally more humid and will keep the items from drying out and shriveling up. To get the most health and taste benefits from your homegrown produce, eat it as soon as possible after harvest, or try preserving it.

Preserve fruits and vegetables at home

When you have an abundance of tasty fruit and vegetables from your garden, you can choose one of a variety of methods to preserve them and enjoy at a later date. Preservation methods include canning, blanching and freezing, drying/dehydrating, and pickling as well as making jams and jellies.

Tips for Controlling Insects in Your Garden

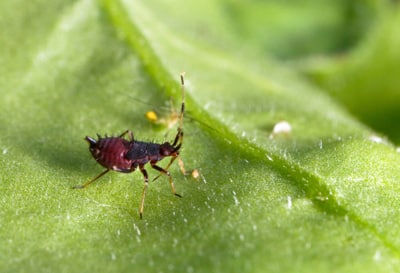
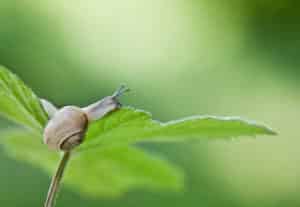
Discovering that insects have damaged your garden makes it apparent that you require insect control. Garden insects such as aphids, white-flies and slugs can make a meal of your garden plants, quickly destroying the fruits of your labor. Try the following tricks for getting garden insects under control.

Raise healthy plants

Your first line of defense against garden pests is to grow vigorous plants that fight off harmful insects. Just as we do a better job of warding off viruses when we eat right, plants are more likely to resist pests and diseases when they are given sufficient sunlight and fertilizer.

Water properly

Improper watering leads to many garden insects. Over-watering,  for instance, can result in an invasion of fungus gnats, while under-watering can cause an infestation of spider mites. Check plants for water readiness before watering. Also avoid leaving pots sitting in saucers full of water. See more of our suggestions for watering your lawn wisely.

Feed the soil

A healthy soil leads to healthy plants likely to reject pests. Compost provides the soil with key macro- and micro-nutrients and encourages the growth of earthworms. Worms create vital airspace in the soil and leave behind castings that also feed the soil. Compost also suppresses soil-borne diseases, which results in even healthier plants. Amend the soil twice a year with compost. Mix compost into the soil before planting, and use it as mulch on established plantings. Mulching with compost will protect the soil surface, and it will break down and feed the soil over time. To learn how to create your own compost bin, click here.

Identify your pests

If you do get an invasion of garden insects, it’s important that before you try any treatments, you know exactly what pest you have on your plants. When possible, take a photo of the pest, or catch one and place it in a sealed plastic bag. Take the pest to your local farm supply or cooperative extension for identification. Once you identify the pest, you can purchase the correct type of insect control product designed to kill that particular pest.

Try natural pest control

Whenever possible, start by attempting to control an insect invasion with the least toxic methods possible. For instance, douse aphids with a strong spray of water, put out newspapers for slugs and sow bugs to congregate under so you can gather them up, and try organic products like insecticidal soap on white-flies.

Use insecticides judiciously

Pesticides also kill beneficial garden insects, so it’s important to use them wisely. Only spray areas of the plant that are infested, and always follow package directions carefully. More is not better when it comes to insecticides. If a package warns against using an insect control near water because it’s harmful to fish, take the warning seriously.

Applying Insecticides to Lawns

When your formerly lush, green lawn displays signs of excessive insect damage, it’s time to consider applying lawn insecticides. Designed to eliminate lawn pests and control further infestation, insecticides for lawns applied properly can bring your turf back to health. Consider the following guidelines for applying insecticides to lawns.

Identify the lawn pest

In order to effectively combat an insect harming your turf, it’s important that you first accurately identify the culprit. A wide variety of insecticides exist, each designed to destroy and control certain insects. If you use the incorrect lawn insecticide, you will not eliminate the insect pest or stop the damage.

Common insect pests that require insecticides for lawns

A wide variety of insects can affect your lawn, so it’s important to make a diagnosis before treatment. Here are three common pests:

  • Grubs — In the larval state, these “C”-shaped creatures with six legs damage grass roots. In the adult stage, they are beetles that fly around the yard. Heavy infestations of grubs in the lawn cause the affected grass to become spongy, and the lack of roots makes it possible to roll back the grass as if it is a piece of carpeting. The grass will exhibit dead and dying sections where the feeding is heaviest. You may also see crows, moles or skunks feeding on the grubs.
  • Chinch bugs — They may be only 1/6 of an inch long, but chinch bugs do a lot of damage. They are common in dry, sunny areas of the lawn, where they suck liquids from the grass and inject toxins that cause the grass to loosen from the soil. They are most prevalent in red fescues, bentgrass, Kentucky bluegrass and perennial ryegrass.
  • Mole crickets — Several species of mole crickets exist. These insect pests have “hands” they use for digging and tunneling through the soil, severing grass roots from the grass and causing bulges in the ground. They do the most damage from late summer into fall. They work at night and are hunted by raccoons, which will dig up the lawn looking for them. You can also see if you have these pests by pouring soapy water on your lawn, which will make them come to the surface.

When to apply insecticides to lawns

When to treat your lawn with insecticide depends on the type of pest. Once you’ve determined the troublemaker, you can consult the appropriate insecticide, which will indicate when to treat. Some insects are better treated in the adult stage, while others require that you apply lawn insecticides when they are in the larval stage.

How to apply insecticides to lawns

Keep in mind that insecticides are poisons, so it’s important to carefully follow the insecticide label and package instructions. Wear eye protection and waterproof rubber gloves when mixing and spraying lawn insecticides. Apply the insecticide in the early morning or late afternoon with a sprayer during still weather. Avoid over-spraying into unaffected locations, such as garden beds. Store the product well away from children and animals.

Pruning Spring-Blooming Shrubs and Small Trees in Summer

Pruning spring-blooming shrubs and small trees is a simple task that can produce big results. Trimming back leads to more vigorous, healthy growth and provides a good opportunity to shape plants as you desire. To successfully prune spring-flowering shrubs, keep the following tips in mind.

When to prune spring-blooming shrubs and small trees

Soon after most spring-blooming shrubs and small trees finish flowering, they begin producing growth on which they will grow next year’s flowers. For this reason, it’s important that you time pruning so that you don’t remove any growth that contains latent buds. With most flowering shrubs, it’s safest to prune right after blooming finishes in early summer.

Pruning tools

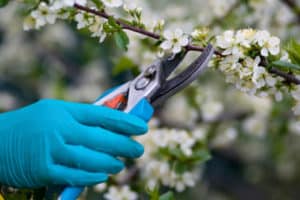
To quickly and easily prune shrubs and small trees, you’ll need several tools on hand. These include pruning shears, lopping shears and a pruning or bow saw. After pruning, sterilize the tools with a 10 percent bleach to 90 percent water solution. Coat the pruning tools with a light lubricant after cleaning.

How to prune shrubs and small trees

To successfully prune, follow these steps:

  1. Remove growth so that there are no crossing or rubbing branches.
  2. Trim long, unbranched stems by cutting them back by one-third and trimming just above a bud. This encourages the plant to grow at that point and produce lower side branches.
  3. Thin out old or weak branches, which opens up the plant to more sunlight and growth. Such thinning also creates more air circulation for the tree or shrub, which helps deter pests and causes more vigorous growth.
  4. For shrubs with multiple stems coming up from the ground, such as lilac, forsythia, dogwood and viburnum, remove all of the old stems, leaving the new ones, which will create refreshed, vigorous growth.
  5. When pruning small trees, remove suckers growing from the base of the trunk or the roots, as these will weaken the tree. Also saw or cut out sagging limbs growing close to the ground and limbs that are diseased, dead or broken.
  6. To prune small branches, cut back to just above a healthy, vigorous bud or to an intersecting branch. Prune to a bud that is pointing in the direction in which you want the plant to grow.
  7. To remove entire limbs, cut close to the branch collar, which is the swollen bark where the limb meets the stem or trunk. Always make clean cuts, as jagged ones can invite pests and diseases.

Work slowly when you prune. When you finish, your goal is a shrub or small tree that does not appear overly pruned. Stop and examine your pruning job as you work, which will help prevent harmful and aesthetically unpleasant excessive pruning.

Alternatives to Bug Spray

Enjoying the outdoors is the hallmark of the summer season, but mosquitoes and other pesky insects can make an otherwise pleasant experience unpleasant. While bug sprays do ward off these unwanted intruders, you may have concerns about the safety of such products and would like to know about creating homemade bug spray and other alternatives to bug spray.

Create a natural mosquito repellent

Natural mosquito repellents can be made by combining certain essential oils with carrier oils. Cinnamon oil, for instance, was found to be more potent in killing mosquitoes than DEET, as reported in the July 14, 2004, edition of the Journal of Agricultural and Food Chemistry. Other essential oils effective at warding off mosquitoes include lemon eucalyptus, citronella and castor. Combine 10 to 25 drops of one of these essential oils with 2 tablespoons of a carrier oil, such as olive, witch hazel or sunflower oil. Apply the natural mosquito repellent by rubbing or spraying it onto exposed skin, avoiding the eye area. Reapply every one to two hours or after exercise and swimming. Store the homemade bug spray in a dark bottle in a cool location.

Other ways to ward off bugs

Other options for keeping bugs at bay include bug repellers, insect-repellent candles that contain citronella, and bug zappers, the latter of which also serve as outdoor lights. For maximum effectiveness, use as many of these tools as possible and place them nearby when you are outdoors.

Grow mosquito-repelling plants in your yard

Certain easy-to-grow plants act as deterrents and tend to ward off bugs like mosquitoes. Consider planting in your garden pest turnoffs, such as citronella, which is the plant that produces the oil commonly used in mosquito-repellent products. Also good to grow are bee balm (monarda), which is also known as horsemint, catnip, ageratum and marigold.

Supplement with barrier methods

Further avoid the possibility of getting bitten by pests by dressing in long sleeves and covering the feet with socks and shoes. And avoid scented soaps and lotions with a fruity or floral fragrance, as well as dark clothing, both of which attract unwanted bugs.

Bird-Friendly Garden

Birds make the garden a lively and pleasant place to be. Entice these winged visitors to your garden by providing food sources and accommodations. Try these tips to encourage birds into your yard.

Offer bird feeders

All types of garden birds will flock to your yard if you put out tasty feed—especially during times of food scarcity. Bird feeders also provide an opportunity to view the birds eating. Tube-style bird feeders are a good choice because they attract a lot of birds. If you have squirrels, try a squirrel-proof feeder. Place bird feeders where you can see them, but 12 to 15 feet from windows and up high away from predators. If you will be hanging a bird feeder over an area with vegetation, consider using shell-less birdseed, which creates less mess and doesn’t inhibit plant growth like shell types of birdseed.

Provide a water source

Birds require water for drinking and bathing. Good sources of water include a birdbath, providing that you change the water every two or three days, as well as a circulating fountain or pond with a gradual, sloped entry and a shallow area. Position the water source at least 10 feet from shrubbery, where predators might hide.

Grow native plants

A good selection of native plants provides year-round food for the birds and give feathered creatures the opportunity to dine on nuts, berries, seeds and nectar. Choose a variety of native plants, including evergreen trees and shrubs where they can seek cover, and flowering plants that provide nectar and its nutrients.

Make a wildlife garden

A wildlife garden offers birds a habitat where they can seek shelter, sleep and even lay their eggs. Plants that produce flowers and fruit and provide a safe place to stay are best for attracting and keeping birds.

Add birdhouses to the landscape

Birds seek shelter to create their nests in the late winter and early spring. Take advantage of this productive time of year by putting out nesting boxes. Ensure that they have ventilation and drainage holes and mount them at least 4 to 6 feet off of the ground.

Avoid using insecticides

Opt for less toxic means of controlling insects in the yard, such as spraying with water. Insects are a primary protein source for growing birds. Allow a tolerable level of insects in the yard so that the birds have something to eat.

How to Grow Tasty and Healthy Sprouts

Looking for an easy-to-grow veggie that is super healthy and ready to harvest in mere days? Grow sprouts. Unlike many homegrown crops that can take weeks or months to produce, sprouts are ready to eat in less than a week. Keep the following tips in mind for how sprouts grow.

All about sprouts

Essentially germinated seeds, sprouts require only water and the right temperature in order to sprout and grow. They are generally grown in the kitchen right where you want them. Rich in vitamins and minerals and high in fiber, sprouts are fairly low in calories. The nutrients in bean sprouts like mung include vitamins K and C, iron and folate. A wide variety of sprouts exist, each with their own flavors and textures. It’s a good idea to try several types of sprouts to see which you prefer. Some common sprouts for which you’ll find seeds include broccoli, mung, alfalfa, marrowfat pea, garbanzo bean, lentil and clover. By growing your own, you have the chance to try many types of sprouts that you wouldn’t be able to find in the grocery store.

Choose a sprouting method

Sprouts require a sterile vessel in which to sprout, such as a sprouting jar or sprouter. They must be kept moist but cannot sit in standing water. Accomplish this by growing them in a sprouter that drains or grow them in a mason jar that you fill with water and then empty. Well-designed sprouters also offer good air circulation and sufficient space for growth.

Growing sprouts

Sprouts germinate around 65 degrees and should be grown out of direct sunlight. When they are mature and ready to eat, place them in indirect light for a few hours to green up. Practice safe food handling with your sprouts. Always wash the sprouter or mason jar with warm, sudsy water prior to filling with seeds. And avoid touching the seeds or sprouts with your hands. Use a spoon to place the seeds in the sprouter and tongs to harvest the sprouts. If you experience mold or fruit flies when growing your sprouts, lower the temperature in the room. Also increase air circulation by running a small fan near the sprouter.

Preparing Your Lawn and Garden for Winter in North

While winter’s harsh weather drives a chill through your bones, it’s also hard on your landscape. Prepare your garden for winter in the North, with its freezing temperatures and howling winds, and you increase the chances that your garden avoids winter damage. Before you go inside to hunker down for cold weather, consider the following winter lawn and garden tips to prep for winter in the North.

While winter’s harsh weather drives a chill through your bones, it’s also hard on your landscape. Prepare your garden for winter in the North, with its freezing temperatures and howling winds, and you increase the chances that your garden avoids winter damage. Before you go inside to hunker down for cold weather, consider the following winter lawn and garden tips to prep for winter in the North.

Winter lawn care in North

Cut your lawn to 1.5 to 2 inches, and keep it at that height throughout the winter months. Remove all fallen leaves and debris from the lawn, which will reduce the chance that accumulated foliage becomes trapped underneath snow and suffocates your lawn. Keeping the lawn clean also helps reduce the risk of snow mold come spring and prevents vole damage. Prior to the first fall freeze, fertilize your lawn with a food that is high in phosphorus and potassium, which will encourage root development.

Clean out garden beds

Prepare your garden beds now to help ensure spring blooms. Remove and compost spent annuals and prune perennials that have entered dormancy. Cut back perennials that have entered dormancy to within 4 to 6 inches from the ground. Exposed stems offer plants some insulation during cold weather. If you’ve had trouble with foliage disease this past spring and summer, bag and throw away the foliage, rather than composting it. Avoid cutting back perennials before they have shut down for winter, as cutting back prematurely can cause the plants to put on new growth, which is susceptible to freeze damage.

Mulch garden beds

Mulching perennials and small shrubs, such as roses, helps protect their roots during the winter months and prevents a weed outbreak come spring. Around the base of each plant, apply 4 inches of wood chips or compost. Water the mulch in place once you finish.

Water evergreens prior to freezing

While you want to avoid watering most plants in your garden prior to the first freeze, evergreens require some extra moisture before the ground hardens. Because they don’t go dormant, evergreens continue to lose moisture from their foliage throughout the winter months. A deep watering before the first freeze allows them to hydrate, which helps prevent winter damage to foliage and branches.

Shield vegetation from animal feeding

During the winter months when food sources are lean, pests such as rabbits, mice, voles and even deer will feed on the branches of trees and shrubs. When feeding occurs at the base of trees, the damage can be fatal. Shrubs can also become comprised by excessive feeding damage. Protect shrubs by encircling them with wire mesh netting and guard trees from damage with plastic tree guards.

Preparing Your Lawn and Garden for Winter in South

Fall’s cooler weather and shorter days signal that it’s time to prep garden for winter in the South. Take the time now to heed the following winter lawn and garden tips, and you can look forward to a healthy winter landscape.

Fall’s cooler weather and shorter days signal that it’s time to prep garden for winter in the South. Take the time now to heed the following winter lawn and garden tips, and you can look forward to a healthy winter landscape.

Winter lawn care in South

Keeping your lawn healthy through the winter months requires that you complete a few key tasks in the fall. Encourage strong root growth by mowing the lawn 2 to 3 inches high and top-dressing with a 1/2-inch layer of compost. Aerate compacted areas, so that the grass doesn’t become waterlogged during winter rains. Also, fertilize lawns at this time. If your lawn was overrun with pesky weeds like annual bluegrass and chickweed last winter, apply an herbicide designed to kill weed seed and prevent problem plants from sprouting in the first place. Don’t apply a pre-emergent on a lawn you are planning to over-seed for winter.

Tend to your fruit trees

Keep your fruit trees healthy by preventing overwintering diseases. This requires that you rake up and dispose of all fallen fruit and foliage underneath your fruit trees.

Clean up and refresh garden beds

Remove finished summer annuals from your garden beds and amend the soil with compost. Plant the beds with cool-weather annuals such as pansies, as well as spring flowering bulbs like daffodils, hyacinth and tulips.

Rake and compost

When deciduous trees drop their leaves, rake them up and add them to the compost pile. If any of the trees or other vegetation dropping leaves had disease or pest problems in the spring and summer, don’t add them to the compost pile.

Apply lime to your garden beds

If you have acidic soil, now is a good time to make it more alkaline for the spring garden by adding lime. Use a fertilizer spreaderto do so and distribute evenly according to package directions.

Adjust watering schedules

Your landscape requires less water during the winter months. Reduce irrigation time by 40 percent to 50 percent for evergreen plants like your lawn and pine trees, and cut back by 70 percent for dormant plants like perennials and deciduous trees. Stop watering altogether during rainy periods.

Shield vegetation from animals

Pests like rabbits, mice and voles will feed on plants during winter months when other food sources are scarce. Prevent them from feeding on the base of trees and shrubs and potentially causing fatal damage by protecting the plants with tree guards and wire mesh netting.

Plant trees and shrubs

Fall in the South is the perfect time to plant trees and shrubs. It is easier for these plants to become established in the cooler weather, and planting now rather than spring gives the plants a chance to set down strong roots so that they can grow quickly come spring.

How to Reseed Your Lawn in Fall for a Thicker, Greener Yard

After summer’s harsh weather, your lawn may be looking a little scraggly. Seeding a lawn in the fall is a good way to breathe new life into your landscape. The cooler fall weather provides the perfect conditions for seed germination, and there is less competition from weeds. When you learn how to reseed your lawn, the seeds you put down now will result in a lush carpeting of green come spring.

After summer’s harsh weather, your lawn may be looking a little scraggly. Seeding a lawn in the fall is a good way to breathe new life into your landscape. The cooler fall weather provides the perfect conditions for seed germination, and there is less competition from weeds. When you learn how to reseed your lawn, the seeds you put down now will result in a lush carpeting of green come spring.

Steps to seeding your lawn

    • Prepare to put down seed by mowing your lawn shorter than usual, which will allow the seed to make good contact with the soil. Don’t put down grass clippings when you mow, as they can smother new grass seedlings.
  • Loosen the soil so the new seed can penetrate, germinate and take root. Do this by raking or aerating. The latter procedure also gets air to the roots of the existing lawn and allows for better water penetration overall.
  • Rake a thin layer of turf-building, seed-starting soil onto the top of your current soil, which will give the seed something on which to attach. Mix into this a starter fertilizer to provide the lawn and seedlings with essential nutrients.
  • Choose the appropriate seed for your yard. There is seed for both shady and sunny yards, as well as seed that stands up to foot traffic. Try to get seed that will produce grass that will most closely resemble your existing lawn.
  • Reseed using a spreader, which will allow you to spread the grass seed evenly.

Maintenance

Your most important task once you’ve applied seed is to keep the grass moist so the seed can germinate. If the seed is allowed to dry out, it won’t survive. In the absence of rainfall, make sure to water daily, keeping the surface of the lawn and the seeds moist. Water daily for seven to 14 days or until the seed has sprouted and the grass is 2 inches tall. At that time, you can taper back on watering. During the first two weeks as the seed is germinating, stay off the grass, which helps prevent compaction of the soil and squashing of the grass seed and seedlings. Once the new grass reaches 3 inches tall, mow to 2 inches high.

Overseed dormant grass

If you live in the South or West and are growing bermudagrass, which goes dormant in the winter months, overseed with annual ryegrass at this time of year. Doing this will give you a green lawn all winter long. The annual rye will die back in the spring when your bermudagrass wakes up. Now that you know how to reseed your lawn in fall, you can look forward to healthy, green turf next spring. – Julie Bawden-Davis

Guide to Planting Warm-Season Vegetables

Growing warm-season vegetables is an enjoyable activity that results in large harvests of homegrown produce favorites like tomatoes, corn, peppers and cucumbers. To have success with your summer garden, consider these tips for how to grow warm-season vegetables. When to plant vegetables Plant your warm-season vegetable garden when the nights are above 60 degrees, which means the soil has warmed sufficiently. Depending on your area of the country, this usually means sometime in April or May. If the soil is not warm enough, the roots and foliage will be stunted, and the vegetable plants will fail to produce. Choose an appropriate vegetable planting site A successful warm-season vegetable harvest requires that you plant in the ideal location. Look for a spot with good air circulation that receives a minimum of six to eight hours of sunlight each day. Warm-season vegetables to plant A wide variety of warm-season vegetable plants exist. Some common crops to consider planting that thrive in the spring and summer months include beans, corn, cucumber, eggplant, melon, pepper, pumpkin, soybean, squash, zucchini, tomatoes, and herbs like basil, rosemary and thyme. Many of these vegetables can be planted from seed, but keep in mind that you will need an extra four to eight weeks of growing time. If it is already spring, consider buying transplants instead, and plan on getting a head start on the growing season next February by seeding your warm-season garden indoors at that time. How to grow vegetables

  • Prepare the planting site. Warm-season vegetables require a well-draining, rich soil. At least two week before planting, prepare the site by mixing in 2 to 3 inches of planter mix or compost, as well as a granular vegetable fertilizer. Work the amendment and fertilizer into the soil well with a cultivator or tiller until the earth is loose and easy to plant.
  • Provide support. Vining and climbing vegetable plants like tomatoes, cucumbers and beans require a trellis or something on which to climb. Tomato cages should be at least 3 feet high and 2 feet wide and made of a durable metal that will not bend under the weight of maturing tomatoes.
  • Plant. During the morning or evening when the sun’s rays are the least harsh, plant the vegetable plants, leaving 8 to 24 inches between plants. Some vegetables, such as corn, squash and tomatoes, require planting further apart so they have room to spread, whereas other vegetables like cucumbers and beans can be planted closer together.
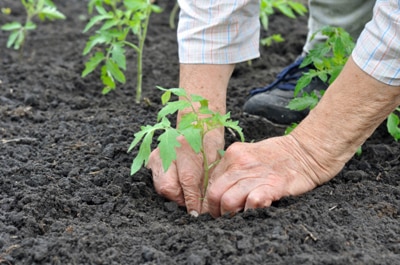
  • Remove the vegetable plants from the containers by gently squeezing the bottom of each plastic pot until the plants come free. Use a hand trowel to create a hole in the ground and insert the plant roots. Back-fill the hole with soil and gently tamp down the soil around the plant.

Water Irrigate warm-season vegetable plants well after planting and keep them moist but not soggy while they become established, which you know has occurred when you see new growth.

How to Create Shade and Sun Gardens

Make plans to plant a garden, and one of your first and most important decisions is whether you should plant a shade garden or create sun garden plans. Knowing which type of exposure to plant for helps you create your ideal garden. Before choosing any plants for your garden, determine if you have a shade or sun garden location.

Shade garden While a shade garden could mean a spot in deep shade, it can also be a location that receives dappled sunlight throughout the day or a short amount of morning sun followed by afternoon shade. Shade garden locations tend to be northern or eastern. Sun garden A sun garden is defined by a location that receives four or more hours of sunlight throughout the day. Such a location is usually located in a southern or western exposure. Plants for shade and sun To have success with sun or shade gardening, you must choose plants that are suited for each type of growing condition. A shade plant will not grow well in a sunny location. The harsh rays of the sun will burn the tender foliage, and the plant is likely to die. Likewise, plants that require sun to thrive will do poorly in low-light conditions. They will experience stunted growth, and if they flower or fruit, they are unlikely to do so in shady conditions. Determine if plants are for shade or sun by consulting the plant tags and inquiring with nursery personnel. A reputable garden center will have the shade plants on display in shady conditions such as under shade cloth, whereas the sun plants will be out in full sun. Some popular shade-loving plants include impatiens, begonia, coleus and Japanese maple. For sun plants, you’ll find geranium, rose, petunia and black-eyed Susan. Sun garden plans For the best presentation with a sun garden, use the layered method when planting. This requires that you plant tall plants in the back of the garden, followed by medium-sized growers in the middle and then finish off the front of the bed with low-growers and ground covers. Such a planting scheme guarantees that you get a good view of all of the plants at once. Shade garden plans Build an eye-catching shade garden by creating a backdrop of foliage in varying shades of green and accenting with variegated foliage that includes colors like red, purple and yellow. Then, place flowering plants that prefer dim conditions in strategic spots throughout the shade garden. If you will be viewing or enjoying the shade garden at night, include white- and silver-colored flowers and foliage, as they will appear to shimmer in the moonlight.

Planting Herbs Outdoors

Planting herbs outdoors adds beauty to your landscape and provides you with fresh, flavorful seasonings in the kitchen. Stepping out your back door and picking fresh basil for your pesto and snipping mint for your tea takes understanding the basics of growing herbs outdoors.

by Julie Bawden-Davis When to plant herbs Herbs grow quickly when planted in the spring. At what point in the spring you plant your herbs depends on your climate. To avoid a slow start or plant damage, wait until the danger of frost has passed before planting herbs. Where to plant herbs Most herbs require a sunny spot with good air circulation in which to thrive. Choose an area that receives at least four to six hours of direct sunlight a day. Some herbs, such as lemon balm, lovage, chervil, mint and parsley, require light shade. Choose a location that drains well, as many herbs such as rosemary and thyme, require sharp, fast drainage. If you are unsure of the drainage in your proposed planting area, dig a 6- to 12-inch hole and fill it with water. The hole will drain within 90 minutes if the drainage is adequate. If you find that the drainage is poor, before planting herbs, amend the soil with a 6-inch layer of compost that you work into the first 8 to 12 inches of soil. Also, plant in a site free of weeds. Rake or dig out weeds with a hand trowel before planting herbs in the chosen planting site. Potted herbs Many herbs thrive in containers, and growing them in pots enables you to place them near the back door for easy harvesting. Potted herbs also make a decorative addition to the garden. When planting in containers, use a high-quality potting soil with added perlite or pumice, which ensures good drainage. Herbs also thrive in raised beds, which are essentially large containers. How to plant herbs Successfully planting herbs requires that you plant each herb at the same level as the plant is in its original nursery container. By doing this, you avoid planting the herbs too high or too low, which are both situations that can result in plant failure. Once you have the plant in the soil, firmly pat down the soil surrounding the plant and water well. Water properly Water herbs when the top 2 to 3 inches of soil dries. Ground plants require watering less frequently than containers, which can dry out in an afternoon during hot weather. Avoid over-watering herbs, as this leads to lush, yet flavorless, growth. Fertilize infrequently Feed your herbs just once or twice during the growing season. Over-fertilized herbs produce thick, green growth with little flavor. Overfeeding dilutes the essential oil production of the herbs, and the oils are what give herbs their intense aroma and flavor. Pinch and prune Enjoy the bounty of your herbs often by pinching back on a regular basis. Pruning out growth keeps the plant bushy and healthy and leads to new growth. Plants that aren’t pinched back frequently become rangy and unattractive.