Portfolio Categories: COMMUNITYTABLE.COM

The Essential Garden Tool Guide

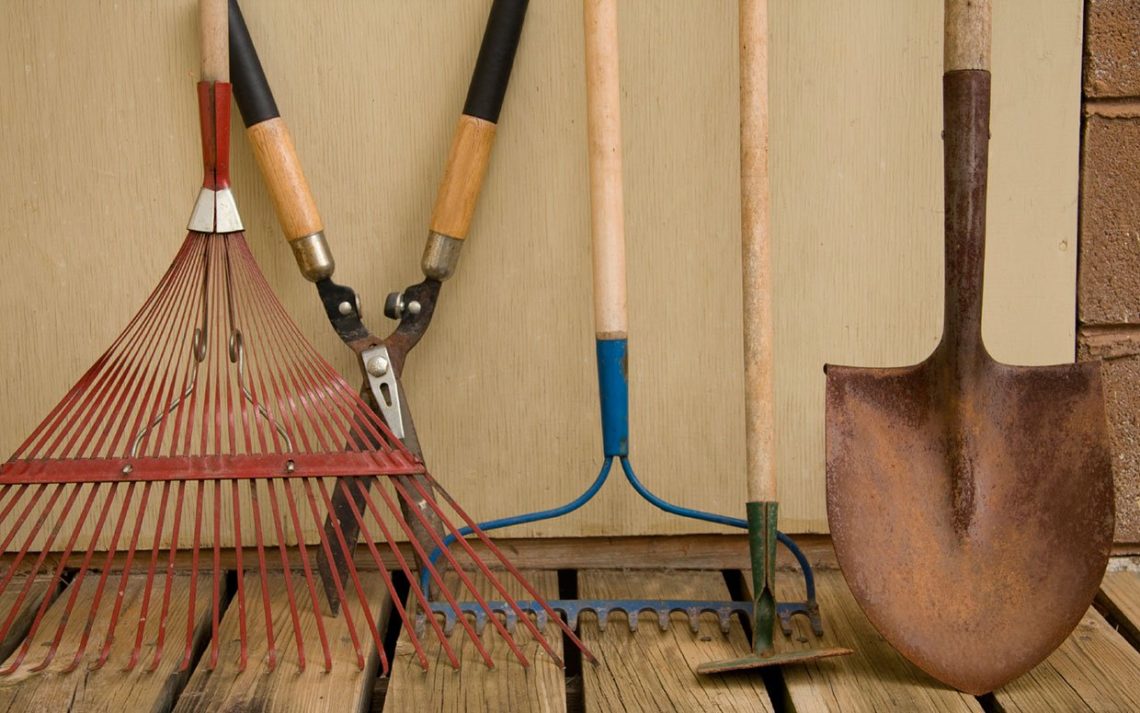
Like a master chef or a skilled mechanic, gardeners require high-quality tools to work their magic in the landscape. Sturdy, well-designed tools, like shovels, rakes, trowels and pruners, allow you to garden efficiently and comfortably.

“When working in the garden or around the yard, having the right tool for the job is critical,” says Rick Meinzer, founder of RedHed Tools, which are modular and can be configured for the task at hand. The owner of Platinum Landscape, Meinzer became frustrated over the years with the fact that many garden tools soon fall apart from the rigors of yard work, so he created his tool line guaranteed to last a lifetime. “You want to rely on your garden tools as trusted friends that stand up to use. Tools that are appropriate for the task and built well are an essential element for any gardener,” says Meinzer, who shares his tips for having the best garden tool experience possible. Choose quality. Poorly built, inferior tools deteriorate. It’s aggravating to be in the middle of double digging your garden and have the shovel break or become loose. Look for metal tools that have been forged, and check that any screws are tight and secure.
  Use correctly. “Understand the purpose of the tool and use accordingly,” says Meinzer. “Don’t use a shovel as a pry bar to remove large rocks or tree stumps. You are going to break it no matter how well it is built.” Using tools as they’re designed also protects you physically. “Leverage the power of the tool and protect your back,” advises Meinzer. “When digging a trench, for instance, stand above the trench and bend over and dig. To lift out the dirt, put one foot down in the trench and the other foot on top and use your legs to lift and move the dirt. Hand placement is also important. Place one hand down low by the tool head when lifting dirt or heavy loads with a shovel, which gives you leverage. Then use your legs to lift up and move the dirt. When raking, move one hand down lower on the handle to get more leverage and create more force.” Compile a complete tool chest. Being able to use the correct tool requires that you have a variety from which to choose. A versatile garden tool chest includes a shovel, spade, rake, pitchfork, hoe, pick, trowel, weeder, lopper, pole pruner, shears and scissors. Maintain. Proper maintenance is the key to tools that work well and stand the test of time. “The most important thing you can do is to clean them after use,” says Meinzer. “A simple wash with water is all you need to do. Also dry them—otherwise non-powder coated tool heads and many wooden handles will deteriorate more quickly.” Further protect your tools by storing them away from sun and moisture, and always put them in the same location every time so you can find them when you need them. Keep them sharp. Many gardening tools—hoes, scissors, pruners, shovels, shears—need sharpening periodically. Wipe blades down with a metal lubricant/protectant and then use a 10-inch flat mill file to sharpen. File at a 20 to 25 degree angle, following the original bevel. To create a fine edge, finish the job with a whetstone.  

Why You Need to Mulch Your Summer Garden

As your plants struggle to stay hydrated in the heat of summer, there is one simple thing you can do for them now that will help in many ways over the long run—mulch. When you mulch your garden and even your houseplants, you mimic Mother Nature, who mulches forest floors with fallen leaves, pine needles and branches.

The benefits of mulch for your summer garden are many. Mulch greatly conserves soil moisture by cutting down on surface evaporation and cooling soil temperatures. This reduces the need for watering by 35-45 percent. The protective layer from mulch shields and feeds the good bacteria in the soil that increase disease and pest resistance and lead to prolific plant growth. Mulch also cuts down on weeds and prevents compaction and erosion. Follow these steps for mulching your summer garden. Choose your mulch. A variety of mulch options exist. What you choose will depend on the look you want and what’s available. Some common mulches include bark, either chipped, ground or shredded. Bark makes an attractive addition to the garden and breaks down slowly. Other choices include leaf mold (decomposed leaves), aged grass clippings and compost, all of which feed and condition the soil over time. Peat moss works well for mulching acid-loving plants like blueberry, azalea and hydrangea. Hay, straw, gravel and crushed stones are other options. The latter are best used in rock gardens, as they don’t conserve much water.
Remove weeds. Mulch cuts down on the germination of weeds, but it won’t get rid of existing weeds. Prior to mulching, weed the area, making sure to take out even the smallest of weeds by the roots. At this time also remove any debris. Soak the area. Before putting down the mulch, thoroughly water the area to be mulched. This will lead to the soil retaining moisture once you add the mulch. Apply the mulch. Add a 2-4-inch-thick layer of mulch to conserve water and inhibit weed growth. The type of mulch you use will dictate how thick you’ll be able to apply it. Bark tends to go on thick, whereas compost and gravel produce thinner layers. It’s also possible to combine mulch types. For instance, apply a 1-inch layer of compost followed by a 2-inch layer of bark. Water again. Once the mulch is all down, seal in moisture and prevent erosion by thoroughly watering the surface of the mulch. Water will weigh down the mulch so it makes good contact with the soil. Keep the surface of the mulch moist. Julie Bawden-Davis is a garden writer and master gardener, who since 1985 has written for publications such as Organic Gardening, Wildflower, Better Homes and Gardens and The Los Angeles Times. She is the author of seven books, including Reader’s Digest Flower GardeningFairy GardeningThe Strawberry Story, and Indoor Gardening the Organic Way, and is the founder of HealthyHouseplants.com.  

Check Out the Top Floral Wedding Trends of 2015

With wedding bells in the air during this season of tying the knot, in addition to the bride herself, flowers are taking center stage. Like all fashion, wedding floral trends change over time. This wedding season is no different.

“Styles go in cycles,” says Mark Held, florist on BloomNation and co-owner of Mark’s Garden in Sherman Oaks, California. His company creates floral designs for all types of weddings, including that of celebrities, such as Pink, Fergie and Josh Duhamel, Gwen Stefani and Jessica Simpson. “We’ve been through a long period of over-the-top weddings, but for this summer and fall the look is now cleaner and more elegant.”

(BloomNation)

Among brides—celebrity and otherwise—refined design is now more important than an abundance of flowers. “Today’s brides seek quality of flowers and design over sheer volume,” says Held. “We are doing a lot of green hedges and arbors, floral pathways and formal stylized gardens—indoors and out. There is more attention to the overall event design so that all elements are integrated and flow from ceremony to cocktails to reception.” Popular flower colors are white, ivory and blush, and flowers you’re likely to see at weddings this summer and fall include dahlias, such as the variety ‘Café au Lait,’ peonies, hydrangeas and pale tone roses like ‘Sahara’ and ‘Quicksand.’ When it comes to celebrity weddings, Held finds that many Hollywood stars are busy, so they have event planners and florists gain insight about what they want and then make those desires a reality. “Many celebrities are conscious of their images, and it is important to present them properly, because they know their photos will become public,” he says. “They also want their privacy. We sometimes do weddings for celebrities without our crew even knowing the identity of the bride or groom. We keep in mind that we’re often designing for unique photo opportunities, such as a cover for People Magazine. The dress, bouquet and backdrop for the ceremony take careful thought and planning.” Considering that flowers are the heart of the big day, it pays for every bride-to-be to pay careful attention to her floral choices. Held offers advice for filling your day with beautiful blooms: Incorporate your personality into your wedding décor. “Do it your own way and don’t copy everyone else,” advises Held. “Gain ideas from Instagram and Pinterest, but do what you want. You know what you like, so trust your instincts and go with them.” Carefully select your florist. A good florist will listen to you and understand your likes and dislikes, helping you develop your own signature look, says Held. Look for the best people to perform the look and feel that you wish to create. Don’t be afraid to be different. If you truly like something in the area of floral design and flower choices, then go for it, says Held. “Today the sky truly is the limit. You can do a red theme wedding or have the reception in a movie theatre. It’s all up to you.” Consider wedding/reception location. Keep in mind that outdoor weddings are weather sensitive. “Do your research and consider heat and rain patterns. Choose flowers that will withstand those conditions for several hours,” says Held. “I like to use roses outdoors for an opulent look, and they also hold up in direct sunlight and heat. Indoor weddings are climate controlled, so you have greater leeway on the flowers you choose.”

(Bloom Nation)

Julie Bawden-Davis is a garden writer and master gardener, who since 1985 has written for publications such as Organic Gardening, Wildflower, Better Homes and Gardens and The Los Angeles Times. She is the author of seven books, including Reader’s Digest Flower GardeningFairy GardeningThe Strawberry Story, and Indoor Gardening the Organic Way, and is the founder of HealthyHouseplants.com.  

Why You Should Protect the Insects in Your Garden

The next time you’re outdoors and notice an odd or scary looking insect, resist the urge to squash it “just in case” it’s a pest. Chances are it’s a good guy for your garden, or at the very least will provide sustenance for local wildlife. The fact is that insects are integral to the survival of our planet.

Many people are unaware that insects are absolutely essential to our world, says entomologist Doug Tallamy, professor of Entomology and Wildlife Ecology at the University of Delaware. He urges home gardeners to lay off the insecticides and instead care for insects. “Just about every living thing on this planet relies on insects in one way or another,” says the author of The Living Landscape and Bringing Nature Home. Of the approximately 4 million insect species in the world, less than 1 percent are actual pests that negatively affect agriculture or are nuisances. The majority of insects perform vital tasks such as pollination, aerating the soil and breaking down dead animals and returning them to the earth. According to Tallamy, if we lost our pollinators, we’d lose most of our plants and experience the collapse of our ecosystems. Insects play a variety of roles in the garden, says horticulturist Jessica Walliser, author of Good Bug Bad Bug: Who’s Who, What They Do and How to Manage Them Organically and Attracting Beneficial Bugs to Your Garden. “In addition to pollinating, some insects consume other insects to keep the ecosystem balanced, while others decompose dead materials so we aren’t up to our necks in waste.” Bees and butterflies get the most attention, but there are numerous other insects that quietly go about their work, including moths, which pollinate the night garden, parasitic wasps, which keep a variety of pests under control and ladybugs and lacewings, both of which eat troublemakers like aphids.
“Lacewings are an amazing group of insects,” says Walliser, who notes that some species of the bug sing a low frequency, haunting song to attract a mate.
Unfortunately, the loss of habitat has put many insects in jeopardy. You can do your part in protecting these often-delicate creatures by keeping the following tips in mind. Provide refuge. Plant layered landscapes in your garden that include a diverse mix of plant species and types, such as trees, shrubs, vines and groundcover. Doing this will provide insects with food and places to breed. Grow native plants. Most insects have co-evolved with native plants in their geographic regions and can only dine and live on such plants. Avoid spraying pesticides and insecticides. Don’t give in to the “yuck factor” and spray before you’ve positively identified an insect. Chances are you’ll discover that the little fellow is a good addition to your garden. This is often the case with the larvae and nymphs of insects, which tend to look a bit frightening but can do good things for your landscape. A lacewing larva, for instance, eats hundreds of aphids a week, so you’ll want to keep this helpful garden resident. Julie Bawden-Davis is a garden writer and master gardener, who since 1985 has written for publications such as Organic Gardening, Wildflower, Better Homes and Gardens and The Los Angeles Times. She is the author of seven books, including Reader’s Digest Flower GardeningFairy GardeningThe Strawberry Story, and Indoor Gardening the Organic Way, and is the founder of HealthyHouseplants.com

Expert Tips for Growing a Crevice Garden

Allowed to grow where they please, many plants pop up in the smallest of spaces. Take a look around the garden and you’re likely to see green growing from unexpected locations such as cracks in stone and concrete walls and pavement.

Peeking out of cracks and crevices, such plants add a touch of magical charm to the garden. Such plantings also soften hardscape and hide damaged concrete, and you don’t need many crevice plantings to make a statement. While plants are certainly happy when they pop up in crevices and cracks, and many gardeners find the volunteer greenery welcome, you don’t have to wait for nature to do its thing. It’s possible to successfully plant in tight spaces, providing you do a little prep work and choose the right plants. Locate/create cracks. Look around the yard for weeds in your concrete and stone surfaces, as many thrive in such tight quarters. If you don’t have any cracks in your concrete, use a Rota hammer to selectively remove square chunks of concrete. When working with brick and stone, take out individual pieces. Consult a landscape contractor if you are uncertain as to how to make cracks and crevices in your hardscape. Inspect available root room. Insert a wooden or metal skewer into a crack to see how far it reaches. You want water to seep into the crevice and not drain away from it. If the skewer fails to go any farther than 1 inch, see if you can dig down a little further and break up the soil so a plant can take root. Ensure good drainage. Plants that do well in crevices tend to like fast drainage, so it’s important that the spot drains well. If necessary, improve drainage by removing the soil and replacing with a mix of 50 percent planter’s mix and 50 percent pumice. Choose small plants or seed. Limited root room requires that you start with tiny plants, such as the 1 1/2- to 2-inch starter plants found in nursery four- or six-packs. Seeding is ideal, as it allows the plants to develop roots to adapt to the crevice. Sprinkle seeds in the crack and apply a thin layer of vermiculite to help keep the area moist while the seeds germinate. Plant with care. Minimize root damage by easing the plant roots into the crevice. Ensure that the roots make contact with soil and fill in with planter’s mix. Water well. Soak the crevice after planting and keep the plants moist until they become established, which will be indicated by new growth. Expect dieback. Forcing roots into tight spots and warm concrete or stone may cause some parts of the plants to die. Prune off the dieback. The healthy areas of the plants will eventually take over the crevice, and the plants will soon be thriving. Maintenance. Once established, many crevice plants require very little care. Simply water them two or three times a week during the spring and summer months and apply a liquid fertilizer every one to two months. Plant possibilities. Plants that do well in tight spots tend to be shallow rooted and drought tolerant. Good selections include plants suited to rock gardens and alpine-type plants native to high elevations. Choose from the following plants: Alyssum Baby’s tears Basket-of-Gold Blue star creeper California poppy Campanula poscharskyana Chamomile Corsican mint Creeping/elfin thyme Dichondra Feverfew Four o’clock Hens and chicks Erodium Lobelia Moneywort Moss (Irish/Scotch) Moss pink Oxalis Pennyroyal (dwarf) Sea thrift Stonecrop sedum Valerian Viola   Julie Bawden-Davis is a garden writer and master gardener, who since 1985 has written for publications such as Organic Gardening, Wildflower, Better Homes and Gardens and The Los Angeles Times. She is the author of seven books, including Reader’s Digest Flower GardeningFairy GardeningThe Strawberry Story, and Indoor Gardening the Organic Way, and is the founder of HealthyHouseplants.com

Expert Tips for Picking the Best Floral Arrangement for Mother’s Day

This Mother’s Day, florists around the nation would like you to think outside the vase when you choose a floral arrangement for mom.

“Your mother is special and unique, and her floral arrangement should reflect that,” says Kate Owsley, a florist on BloomNation and lead floral designer at Back Bay Florist in Boston. “Many people ask florists for a typical ‘Mother’s Day’ arrangement, but there isn’t such a thing. Every mom has her own tastes, and it’s her style that the arrangement should reflect.” Rather than ordering a generic arrangement, think about your mom’s favorite colors, the style of her home, the way she dresses and her personality. Here are a few different styles to give you some ideas.

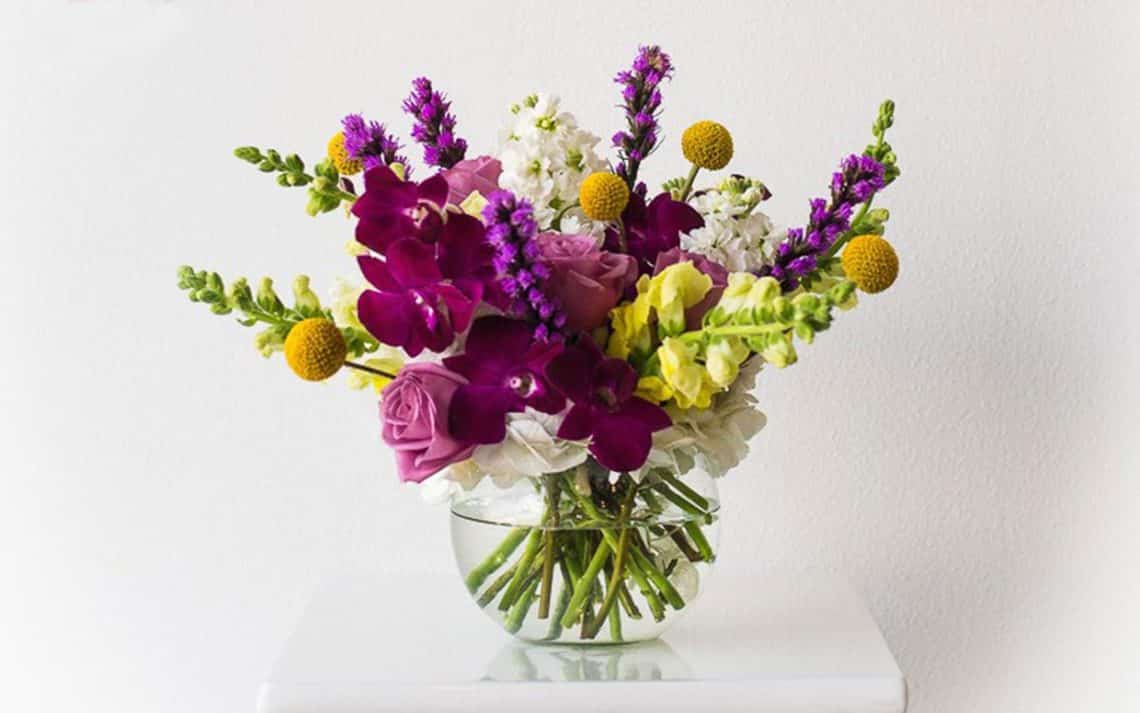
Traditional: If mom tends to like a classic look, a traditional arrangement is the perfect gift. Such designs are usually created in tall vases and include flowers such as rose, lily, daisy, stock, iris, tulip, gladiola and baby’s breath.

Cottage: Moms who have cottage-style décor in their homes and like to garden are often delighted with arrangements that sport blue hydrangea, sunflower, lilac, snapdragon, anemone, poppy pod, hyacinth and daffodil. If your cottage-style mom is also a gardener, get ideas about her favorite flowers by what she grows.
  Modern: Sleek, monochromatic designs are what moms with a contemporary style like. Good choices in flowers for such dynamic floral arrangements include cala lily, flowering branches, white hydrangea, green trick dianthus, orchid, ginger, succulents and ti leaves. Eclectic: The mom who marches to her own drum and sports a unique, quirky style tends to gravitate toward unusual, flowing arrangements on the wild side containing flower and filler selections such as peony, jasmine, silver brunia, veronica, hellebore, scabiosa pods, ranunculus and berries.
      Feminine: If your mom is still a girl at heart, then an ultra-feminine design is sure to make her smile. Choose flowers in blush and soft pink tones, such as rose, peony, hydrangea, dusty miller and lilac. Everlasting: Those moms who prefer something more enduring than a bouquet of cut flowers enjoy containers of planted items, such as houseplants. Other good long-lasting options include dried flower bouquets that can be displayed indefinitely and succulent gardens.
Choose containers carefully. Whatever type of floral arrangement you get for mom, pay equal attention to the vase, which pulls the whole arrangement together, says Owsley. “Vases run the gamut, from wooden or vintage pedestal glass to concrete or metal. Also keep in mind that the dimensions of the opening in the vase will dictate the style of arrangement that can be made.” 
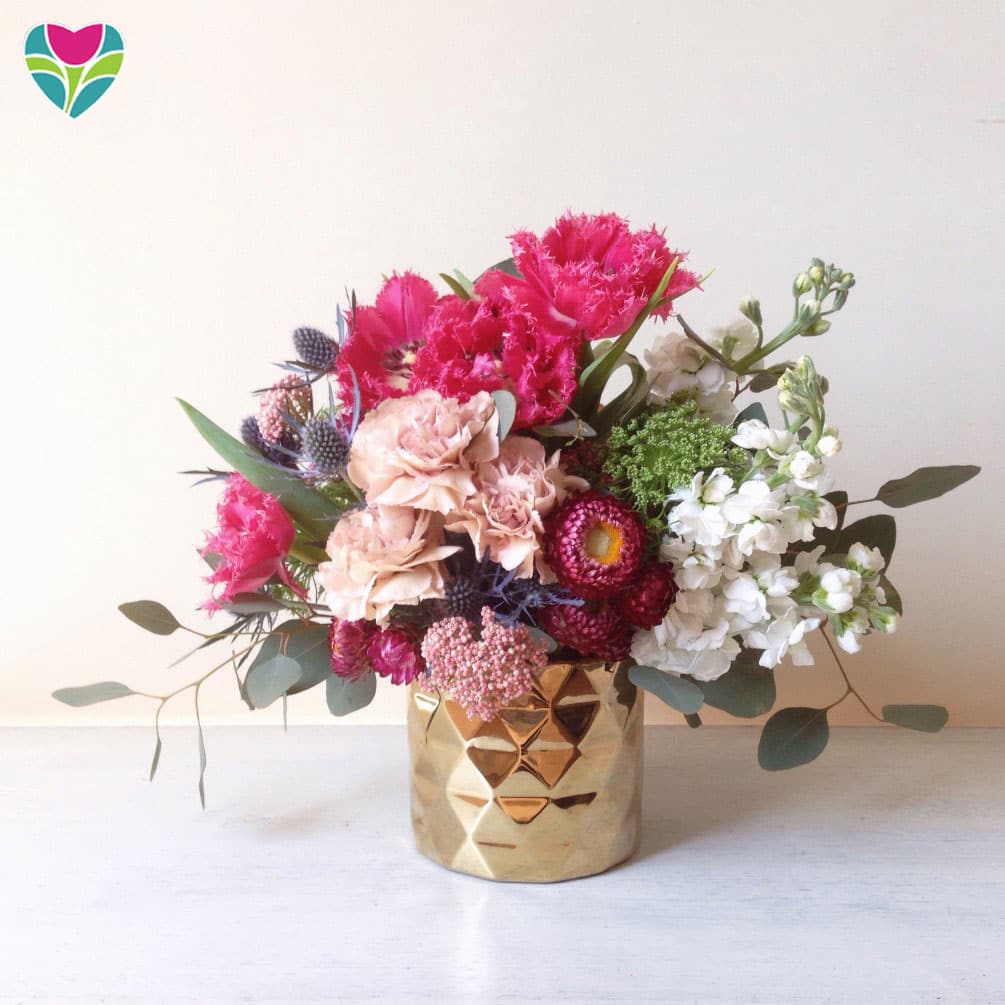
Mother’s Day vies with Valentine’s Day as the busiest for florists, so order as early as possible, says Owsley. “And don’t forget the note. Take the opportunity to let mom know how much you care.” If you order through the online floral marketplace, BloomNation, you can get a handcrafted design from one of the country’s top florists. They send you a photo of the arrangement before it’s delivered to mom. Julie Bawden-Davis is a garden writer and master gardener, who since 1985 has written for publications such as Organic Gardening, Wildflower, Better Homes and Gardens and The Los Angeles Times. She is the author of seven books, including Reader’s Digest Flower GardeningFairy GardeningThe Strawberry Story, and Indoor Gardening the Organic Way, and is the founder of HealthyHouseplants.com  

How to Create a Carefree Living Wall

If you think you don’t have sufficient garden space or you wish to hide unattractive vertical surfaces in your garden, Shawna Coronado wants to talk to you. The author of Grow a Living Wall has a solution to limited garden space—installing a vertical garden. By growing on elements like walls, fences and gates, you increase your growing space exponentially.

The desire to grow more plants led Coronado to vertical growing. After buying a window box and determining that it gave her added growing space, she did the math regarding stacking five such window boxes on top of one another and ended up with the ability to grow 35-40 plants in those boxes, which is more than many full-sized gardens. Since that revelation, Coronado has devised a system for planting a wide variety of living walls, including succulents, vegetables, herbs and aromatherapy gardens, all of which and more she shares in her book. “It is very easy to grow herbs, flowers, vegetables and perennials in a vertical system,” she says. “Plants can be grown in shade to full sun.”

(Shawna Coronado)

When Coronado talks about a living wall, she isn’t referring to plants rooted in the ground and growing up a wall. A living wall consists of a self-contained vertical garden with a soil- or water-based medium that is fastened to a vertical surface. Some living wall systems also have the ability to automate watering. In addition to increasing your growing space, living walls have a wide variety of benefits. They are the antidote to small space gardens, provide those with limited mobility an easier way to garden, and they make otherwise boring vertical spaces green and gorgeous. “Growing a living wall can also sometimes extend the growing season if a gardener plans well. For instance, putting a wall up in a warm, protected niche might enable seasonal plants a few extra days— or even weeks—of growth,” says Coronado, who hosts the Good Green Home Show, a radio show focused on social good and organic living. “Living walls can also function as an added layer of insulation on a home by reducing the heat effect for a homeowner and simultaneously saving money.” 
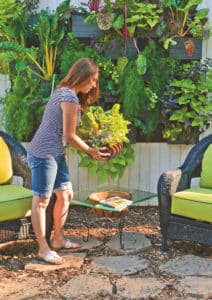
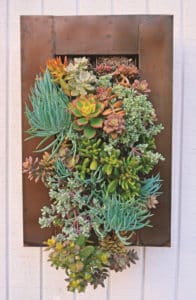
Better yet, living walls don’t require weeding. “No weeds means incredible time-saving advantages for an urban family,” says Coronado. “Additionally, if you set up a container garden watering system on your living wall unit, you will not have to water the plants either. No weeds and no watering means a super easy gardening experience.” To have the best luck with a living garden it’s important to use the best soil mix. “For example, if you have drought conditions, it might be a good idea to plant your living wall garden in moisture retentive soil,” says Coronado. “One of my favorite recipes for a moisture retentive mix is one-third rotted manure, one-third traditional potting soil, and one-third compost. Also make sure to feed your vertical garden with a well-balanced fertilizer every 4-8 weeks.
      Julie Bawden-Davis is a garden writer and master gardener, who since 1985 has written for publications such as Organic Gardening, Wildflower, Better Homes and Gardens and The Los Angeles Times. She is the author of seven books, including Reader’s Digest Flower GardeningFairy GardeningThe Strawberry Story, and Indoor Gardening the Organic Way, and is the founder of HealthyHouseplants.com.

Create a Welcoming Butterfly Garden in Your Yard

The warm, sunny days of spring bring butterflies back to the garden. Luring these lofty beauties to stay in your landscape is well worth the effort. Butterflies add an unmatched ethereal sense of movement to the garden.

Plant a butterfly garden and you can enjoy a confetti display of multi-colored, winged visitors floating about your yard throughout the spring and summer. Even better, you’ll be doing good things for the planet. These graceful beauties might seem like pretty “airheads,” but they’re actually environmentalists. Butterflies are one of the world’s top pollinators. They pollinate many species of flowering plants, and without them many crops wouldn’t get fertilized. These winged beauties aren’t as productive as bees, but they are often the main insect flying around flowers, and that means they do a lot of pollinating. In their adult and larval stages, butterflies also make a good food source for other animals—especially birds. As a matter of fact, mother birds must feed their nestlings a steady supply of hundreds of caterpillars in their first weeks of life.
(Julie Bawden-Davis)
Lure butterflies to your garden with these tips:
Create a place for butterflies to lay eggs that shields the resulting chrysalis from predators and provides food for the adults and larvae. Good choices for this include what are known as host plants. For instance, shrubs like spiraea and trees like ash. Other good host plants include aster, birch, broccoli, cassia, dill, elm, lupine, mallow, milkweed, mustard, parsley, passion vine and Southern Magnolia. Provide a basking area. Sunning is the key to butterfly flight. The insects must keep their body temperatures above 70 degrees or they can’t fly. Sunny spots with flat stones or stone walls make good places for butterflies to get warmed up for flying. Offer shallow water. Butterflies require puddles of mud or sand in which to draw out water, salt and nutrients. This behavior is known as puddling. Place the puddles in sunny areas. Serve up nectar plants. The more items you have on the menu for butterflies to sample, the better your chances for attracting them to your yard. Some good nectar plants include sunflower, columbine, butterfly bush, Mexican plum, coreopsis, black-eyed Susan, lantana, yarrow, milkweed, purple coneflower, daylily, honeysuckle, petunia, salvia, marigold and zinnia.   Julie Bawden-Davis is a garden writer and master gardener, who since 1985 has written for publications such as Organic Gardening, Wildflower, Better Homes and Gardens and The Los Angeles Times. She is the author of seven books, including Reader’s Digest Flower GardeningFairy GardeningThe Strawberry Story, and Indoor Gardening the Organic Way, and is the founder of HealthyHouseplants.com.  

How to Repot a Houseplant

Your houseplants may live their lives indoors, but they know that spring has sprung. The season’s warm weather initiates new growth, which makes it the ideal time to repot your indoor garden. Signs your houseplants require repotting include roots coming out of the bottom of the pot, water rushing through when you water and sluggish, weak growth. If the pot is filled with more roots than soil, it’s definitely time for repotting. To have the best luck repotting your houseplants, keep the following guidelines in mind. Select the right size pot. It might seem like a great idea to plant your houseplant in a much larger pot so you don’t have to repot for a long time, but by doing that you’ll be signing the plant’s death warrant. Excess soil around a plant remains wet and results in perpetually wet roots that succumb to fungal disease and rot. Use a pot that is the same size as the existing container or just one size larger. You do want the plant to have new soil in which to grow, just not too much. The roots should fill about one-half of the pot. Choose a new pot that has drainage holes. Keep in mind that plastic pots are the most water retentive. Terra-cotta pots tend to dry out quickly. If you prefer the look of clay but don’t want the pot to dry out fast, opt for glazed ceramic pots, which do a better job of retaining water than untreated clay. Prevent transplant shock by watering the plant with warm water two to four hours prior to repotting. Remove the plant from its old pot carefully. Attempt to hold the pot upside down with one hand and ease it out of the pot with the other. If the plant gets stuck, try running a knife around the perimeter and try again. If the plant refuses to come out, you may have to cut the pot if it’s plastic or break it if its terra-cotta or ceramic. Prior to doing this, try soaking the entire pot in water for an hour. This may dislodge the plant from the pot. Loosen plant roots and shake off excess soil. Trim especially thick root masses by 10 to 20 percent, which will encourage them to reach into new soil. If you want to plant in the same container, trim the root mass by one inch. Fill the container two-thirds full with moist organic potting soil that drains well. Place the plant in the pot, fanning out the roots. Fill the pot with soil. While doing so, tap the container a couple of times during the process so that the soil settles. Fill the pot with soil to an inch below the pot rim. Tamp down the soil. You should have covered the plant roots but not the stem. Water the plant well and let it drain. Don’t water again until the top inch of soil has dried out. This may take two to three weeks or even longer to occur, as most plants use less water when establishing. You’ll know the plant has established itself when it puts on new growth. Wait to feed the plant until it resumes new growth. At that time give it a half-strength solution of an organic fertilizer. Prepare to watch your houseplant flourish in its new soil.

Grow Tasty Lemon Verbena

Of all lemon-scented and flavored herbs, lemon verbena (Aloysia triphylla) is by far the winner when it comes to fresh lemon taste and smell. Brush the narrow, pointy leaves of this shrub, and you’ll release the tempting odor of lemon.

A South American native, lemon verbena grows outdoors in most climates during the summer months. In mild climates it will go dormant during the winter. In climates that freeze, it’s best to grow the plant in a container and bring it indoors for the winter months. Lemon verbena makes a tasty herbal tea. It’s a popular ingredient in a number of commercially prepared teas, including Vervein tea. To use the leaves for herbal tea, simple rinse them well and place the leaves in hot water, allowing them to steep for five minutes. Remove the leaves and add sweetener to taste. Also use lemon verbena to flavor fruit desserts and ice cream, and you can add it to poultry dishes, marinades, and vinegar. It also makes a fragrant potpourri and is often used medicinally for stomach problems. To successfully grow your own lemon verbena, keep the following tips in mind. Provide high light. Lemon verbena requires bright, filtered light in order to thrive. Outdoors, place in a full sun or brightly lit filtered light location. Indoors, grow the plant one to two feet from a sunny window or under full-spectrum lighting.
Give lemon verbena room to grow. If you grow lemon verbena in the ground, keep in mind that it will reach 3- to 6-feet tall and 3-feet wide. To plant in a container, go to the next pot size up from the nursery container. Use high-quality potting soil that drains well. Provide excellent drainage. Lemon verbena doesn’t do well in compacted, heavy soil that prevents good drainage. If drainage is a problem, amend the soil with 30-50 percent compost. Water lemon verbena when the top 2 to 3 inches of soil has dried. Lemon verbena likes the soil a little on the dry side. Fertilize. Lemon verbena is a heavy feeder. Give the plant a dosage of an all-purpose organic food monthly, from spring into early fall. Prune. Lemon verbena becomes leggy and rangy when allowed to roam free. Pinching back some new leaves causes the plant to become bushier. Also prune off any small white flowers if they appear, which will keep the plant producing leaves. Once the plant goes dormant in the fall, do a light pruning to shape. Dry leaves by placing them on a screen or hanging a bunch upside down in a cool, dark area. When the leaves are completely dried, they can be put in a sealed container that doesn’t let in light. When you want to use the leaves, crushing them releases the heavenly lemon scent and flavor. Julie Bawden-Davis is a garden writer and master gardener, who since 1985 has written for publications such as Organic Gardening, Wildflower, Better Homes and Gardens and The Los Angeles Times. She is the author of seven books, including Reader’s Digest Flower GardeningFairy GardeningThe Strawberry Story, and Indoor Gardening the Organic Way, and is the founder of HealthyHouseplants.com.  

Dye Your Easter Eggs Naturally

If you dye your Easter eggs using natural botanical dyes, be prepared to become a bit breathless when you pull the resulting eggs from the dye mix. Using natural materials to make dyes creates spellbinding colors much richer and more complex than any food coloring-based hue.

In her book A Garden to Dye For, Chris McLaughlin shows how to use common foods and plants from your garden to create natural dyes for eggs and fabrics. The author got her start with natural plant dyes two decades ago when she began pounding flowers to extract their colors. 
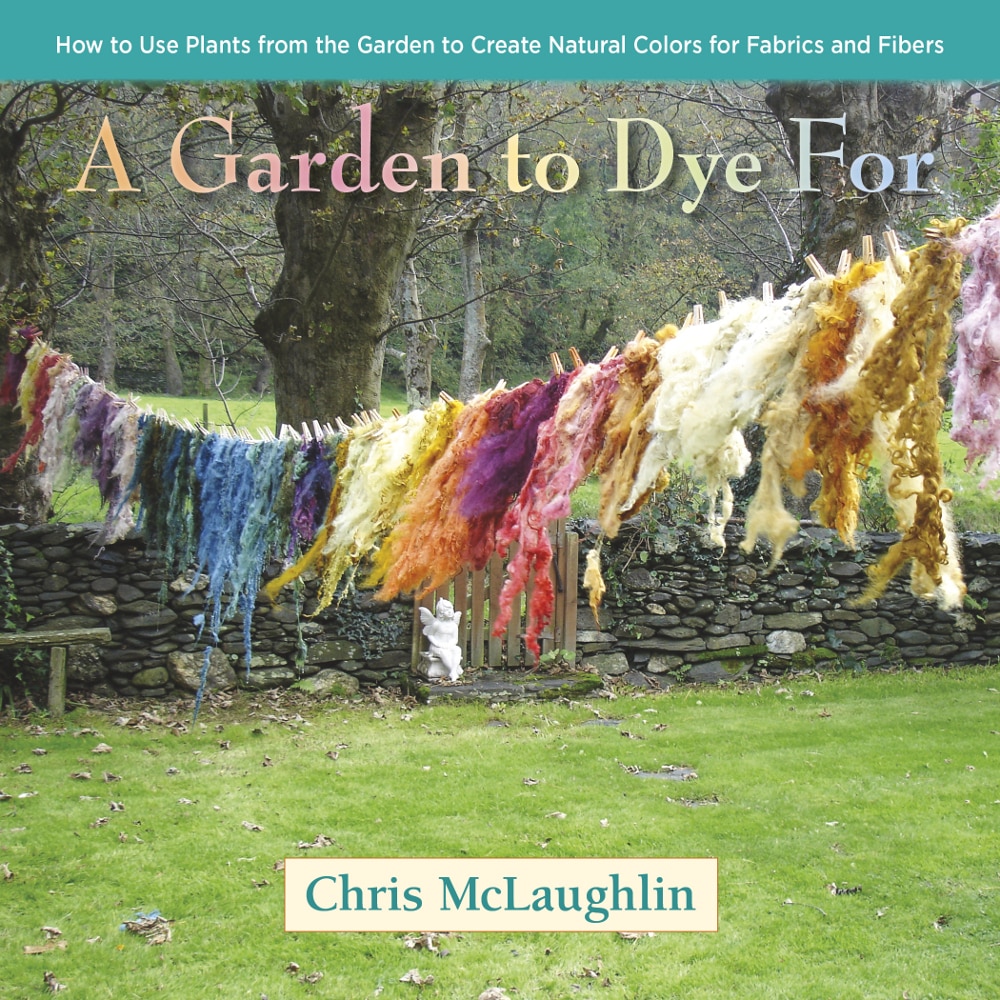
McLaughlin’s book is chock full of photos of naturally dyed items and features more than 40 garden plants that can be used to make a rainbow of colors for your eggs and more. She dyes with hot and cold dye methods. The latter is her favorite, because the process results in intense colors. Here McLaughlin shares her cold dye method for your Easter eggs. 
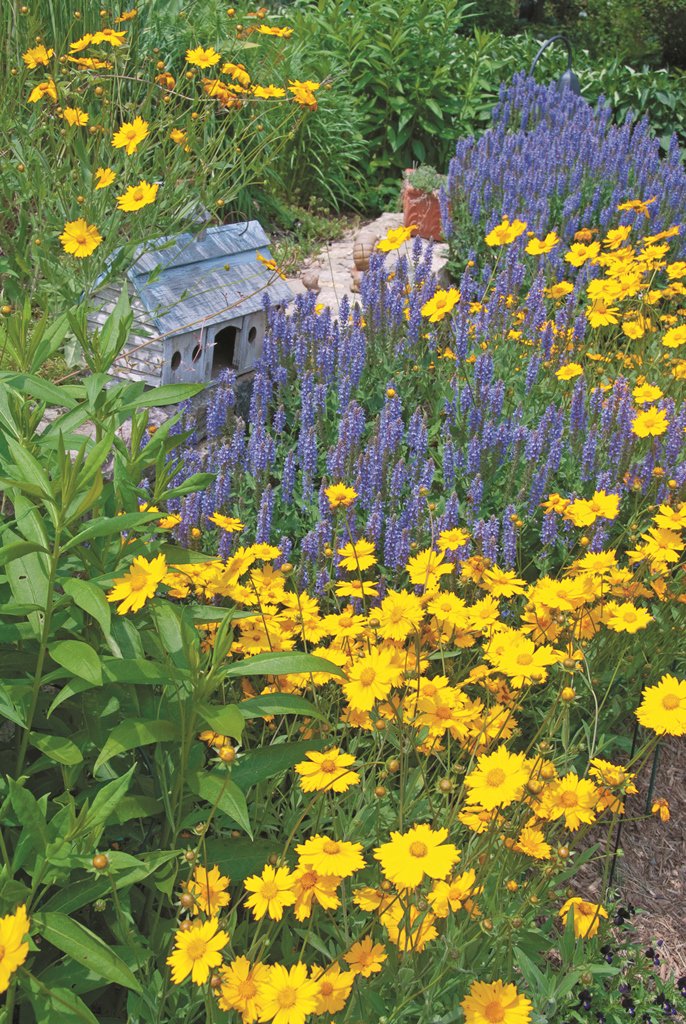
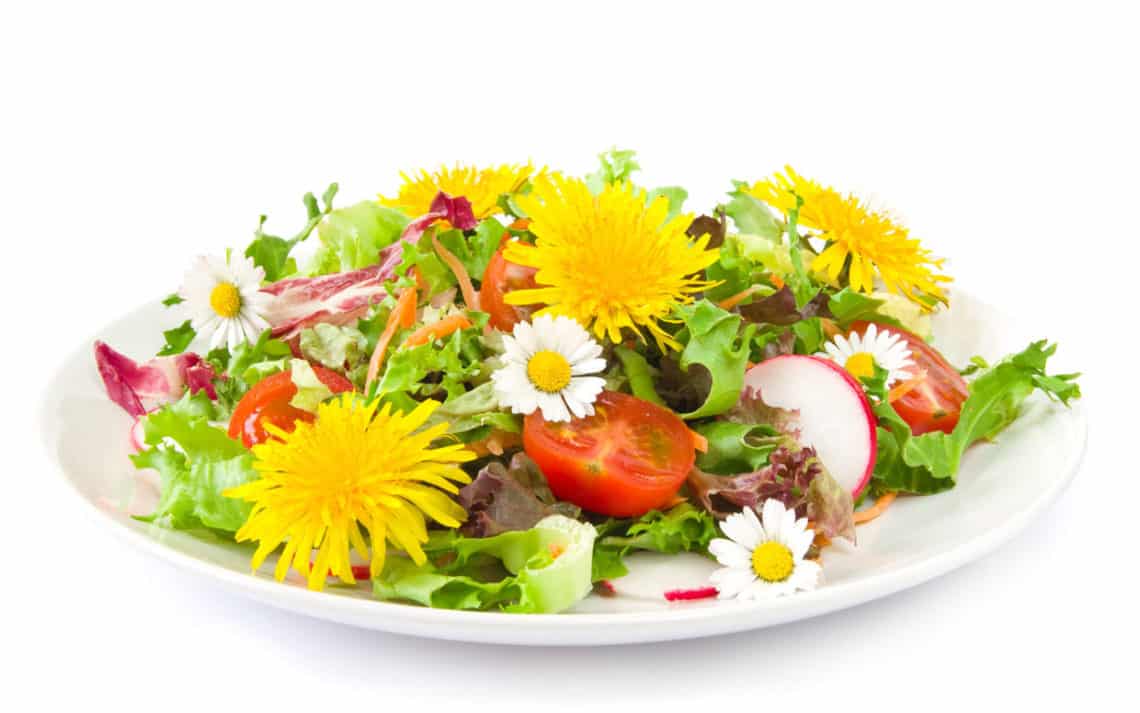
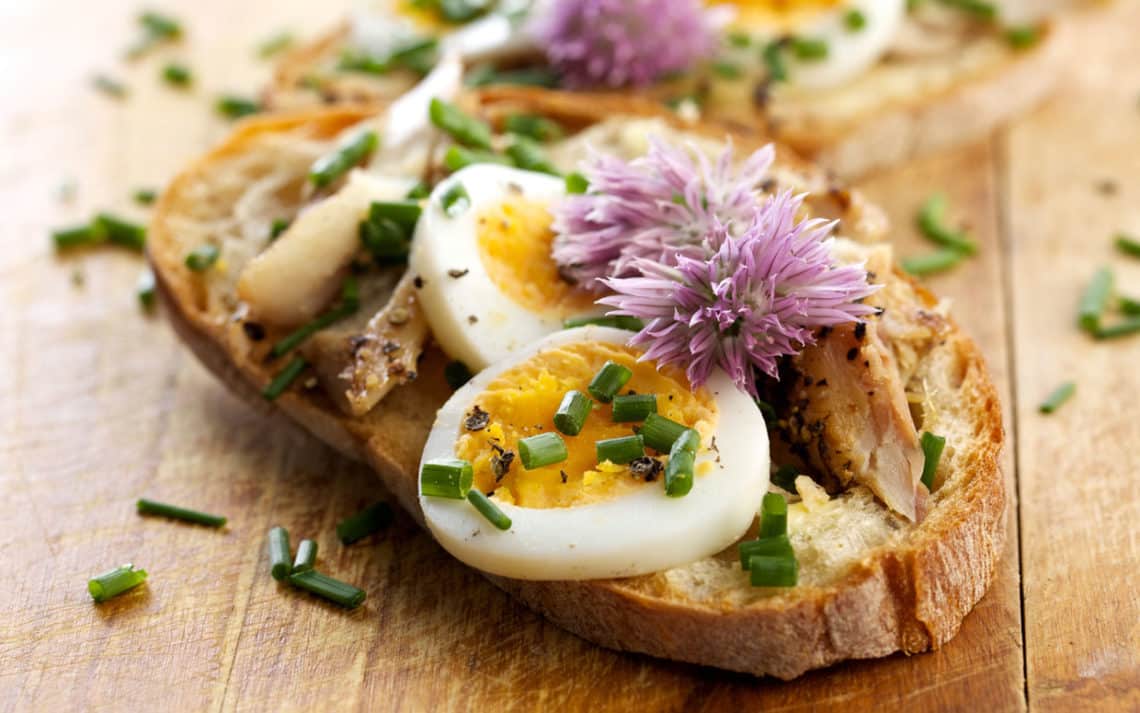
Pick plants from the garden. Good choices include rudbeckia, calendula, coreopsis, St. John’s wort, marigold, and chamomile. Make certain that the plant materials you gather from the garden are not toxic. Dyes for eggs to be eaten should always be made only from edible plants.
Use kitchen scraps. Try beets, blackberries, blueberries, onion skins, red cabbage, and turmeric. Simmer the dye materials separately in pots of water for 20-25 minutes. Remove the materials from the water. Pour each dye color into a glass jar or bowl and add 1/8 cup of vinegar. Let the liquid cool. Add hardboiled eggs to each dye color. Leave the eggs in the solutions for at least an hour and up to 10 hours. (If you plan to eat the eggs and soak them for more than one hour, keep them soaking in the dye mix in the refrigerator). Note how you made your favorite dye colors. To ensure that you can recreate your masterpiece hues, record what materials you used, how much, and how long you kept the eggs in the dye. Julie Bawden-Davis is a garden writer and master gardener, who since 1985 has written for publications such as Organic Gardening, Wildflower, Better Homes and Gardens and The Los Angeles Times. She is the author of seven books, including Reader’s Digest Flower GardeningFairy GardeningThe Strawberry Story, and Indoor Gardening the Organic Way, and is the founder of HealthyHouseplants.com.  

Create Nonstop Color in Your Garden

To create a garden that resonates, take a cue from interior designers. Planning an eye-catching landscape that attracts attention throughout the year hinges on color choice. In her new book, The Nonstop Color Garden, “GardenMama” Nellie Neal shares her secrets for choosing just the right hues for your garden and designing in such a way that your landscape features color throughout the year. “I am always inspired by gardens that reveal their beauty high and low across the seasons—gardens you can enjoy whether it’s 104 degrees in July in Georgia or a frigid January day in Minnesota,” she says. “When I think about how to achieve that particular bliss, it’s the use of color that sets such gardens apart.” Color sets a mood and works to unify gardens, says Neal, whose book walks you through the steps to designing with color in order to create an awe-inspiring landscape. “Use plants and hardscape and you can create boldly contrasting forms, emphasize particular design elements, highlight a destination in the garden or shield a view,” she says. Though flowering plants certainly bring a kaleidoscope of color to the garden, they’re only a part of the color design process. “I think of annual flowers as jewelry,” says Neal. “They’re the brooches and earrings that complete every look. Essential, but only effective if the larger color palette works. Every gardener has a favorite color that never fails to please. For me green is that color with its nearly endless shades, hues and intensities. The high contrast of forest green and rich red iron tones makes my personal statement and creates the perfect setting for a riot of annual flowers.” To create a nonstop color garden of your own, start by picking a color palette and sticking with it, suggests Neal. “Begin with the color you most want to see,” she says. “Pick two shades of that color and then add two or three other major colors you want to combine with them. For me, the color is green, the shades are lime and teal, and the two other colors are lilac and coral. Design with your chosen color palette when selecting trees, shrubs, seasonal color, accessories, and paint for hardscape.” To ensure that you have color throughout the year, Neal suggests taking photos every season and looking for areas that require color; then fill in those spots. She also advises ignoring color trends, which come and go. “The color(s) you use in your garden directly reflect your personal taste and style, so embrace them.” Chock full of photos and illustrations of gardens designed with color in mind, NonStop Color Garden guides you in developing your own color style. The book also features an encyclopedia of colorful plants, including trees, shrubs, groundcovers, and flowering perennials. Click the gallery to see some beautiful photos from the book. Julie Bawden-Davis is a garden writer and master gardener, who since 1985 has written for publications such as Organic Gardening, Wildflower, Better Homes and Gardens and The Los Angeles Times. She is the author of seven books, including Reader’s Digest Flower GardeningFairy GardeningThe Strawberry Story, and Indoor Gardening the Organic Way, and is the founder of HealthyHouseplants.com.  

Grow Your Own Pineapple!

After a long winter, are you dreaming of a tropical vacation with all of the perks—including snacking on tasty fruits like sweet, juicy pineapple? If so, grow a little slice of the tropics at home by rooting your own pineapple. After a couple of years of growth, the plant will even produce edible fruit.

A member of the bromeliad family, pineapples are surprisingly easy to grow indoors during the winter months. Once the weather warms and stays above 60 degrees Fahrenheit, you can move the plant outdoors. In addition to fruiting, pineapple makes an attractive potted plant. To successfully root and grow a pineapple at home, keep the following guidelines in mind. Purchase a ripe pineapple. Choose a fruit with golden-brown skin and green leaves that are firm and not brown or yellow. You want the fruit to be just ripening, not overly ripe. If the leaves are loose and easy to pull off, the fruit is too ripe. Twist off the leaves as a unit, taking with them a small portion of stalk. If you are unable to do this, cut the leaves off the top of the fruit. In either case, you want to trim off excess fruit flesh hanging onto the stock, as it could cause the plant to rot when you root it. Air dry it for two to three days, which will allow the stalk to heal over and prevent rotting when you plant. Place the stalk end in a solution of water and a pinch of rooting hormone. Leave the fruit in the solution for three to six weeks until roots form. Add more water when the level gets low.
Plant the rooted pineapple in a well-draining potting soil, such as cactus mix. Use an 8- to 10-inch clay pot with a drainage hole. Cover the roots with soil, leaving the foliage exposed. Place the container in a bright window or in a protected location outdoors that receives morning sun and afternoon shade. Expect slow growth initially. The plant will take a couple of months to get established. You’ll know that it is growing when you see new leaf growth. Pineapple will grow 6 to 8 inches the first year, eventually reaching about 2 feet tall. After two years, expect fruit, which will pop up in the center of the crown and take six to eight months to mature. Before the fruit ripens, baby pineapple plants will spring up near the mother plant and will be ready to take over when the plant is done fruiting. When the fruit ripens, cut it from the plant. Remove the plant to make room for the new plantlets. Water when the top inch of soil has dried. The plant should remain moist but not soggy. Feed twice a year with an organic vegetable or fruit fertilizer. Always fertilize when you see fruit forming. Julie Bawden-Davis is a garden writer and master gardener, who since 1985 has written for publications such as Organic Gardening, Wildflower, Better Homes and Gardens and The Los Angeles Times. She is the author of seven books, including Reader’s Digest Flower GardeningFairy GardeningThe Strawberry Story, and Indoor Gardening the Organic Way, and is the founder of HealthyHouseplants.com.  

Enjoy Tasty Edible Flowers

The next time you see a rose in the garden, rather than stopping to smell it, try taking a bite. Roses are one of many tasty edible flowers worth trying. If eating flowers seems odd to you, consider this: We consume the seeds, foliage, fruits, and even roots of plants, so why not the flowers? And if you really want to get technical, when you eat fruit, you are essentially eating flowers, because all fruit starts with a flower. Not all blooms are edible, but many are. They make delightful additions to salads and stir-fries, and they can even be candied and used to top baked goods. The following tips will help you enjoy edible blooms: Experiment. Like all foods, edible flowers vary greatly in taste, so be adventurous and try a wide variety of them. Some, like roses, are mild, while nasturtiums have a spicy, radish-like taste. Certain flowers are sweet, like honeysuckle and pansy, and others are markedly floral, like lavender. Additional tasty edible flowers to try include fennel blooms, zucchini blossoms (which are excellent stuffed with meat or cheese), hibiscus, calendula, borage, viola, Johnny Jump-up, anise hyssop, dianthus, dandelion, lilac, and pineapple sage. Use caution. Ensure beyond a shadow of a doubt that a flower is edible before eating it. Some flowers, such as foxglove and sweet peas, are highly toxic, so correctly identifying the blooms is crucial. Also avoid any flowers that have been sprayed with pesticides or chemical fertilizers, as you will end up ingesting them with the flowers. Let your imagination soar when using edible flowers. Besides adding them to salads and stir-fries, edible flowers can be put in casseroles, omelets, and quiches. It’s also fun to use them to make flavored vinegars and butters. Flavor sugar with lilac and lavender. Add the flowers to your sugar bowl, and your tea and coffee will have fragrant floral undertones. Some flowers are also particularly tasty when candied, such as pansy and viola. Harvest edible flowers just prior to using them, as most soon wilt. While clipping the blooms, avoid exposing them to the sun, as this will cause them to quickly deteriorate. Right before eating or using edible flowers, wash them under a gentle stream of cool water at the kitchen sink. Shake the excess water off and place them on paper towels to drain. If harvested ahead of time, store the flowers with their stems in water in the refrigerator. Julie Bawden-Davis is a garden writer and master gardener, who since 1985 has written for publications such as Organic Gardening, Wildflower, Better Homes and Gardens and The Los Angeles Times. She is the author of seven books, including Reader’s Digest Flower Gardening, Fairy Gardening, The Strawberry Story Series, and Indoor Gardening the Organic Way, and is the founder of HealthyHouseplants.com.

6 Tips for Moving Your Houseplants Indoors for Winter

Now that nighttime temperatures are dipping, it’s time to move houseplants that vacationed outdoors during the warm months indoors. When the temperature remains at 45 degrees Fahrenheit or below at night, your tender tropicals and subtropicals are safest inside.
Besides saving your houseplants from imminent death outdoors, bringing them indoors is a treat for you during the long winter days ahead, says Mandy Stanley, a ceramic artist and Pilates instructor who lives in Acworth, Georgia. “Having all of the extra greenery indoors when the weather outside is cold and unpleasant makes me feel good, and I bring in herbs that I use for cooking all winter, such as thyme, oregano, chives, and tarragon,” she says. Successfully moving houseplants indoors so they thrive during the winter months takes keeping the following tips in mind. 1. Wash your plants with a strong spray of water outdoors, and then apply insecticidal soap and let it dry. “This procedure is important, because it removes and destroys insect pests and their eggs,” says Stanley. “Any pests on your plants will multiply rapidly indoors and quickly cause an infestation of your indoor garden.”
2. Move plants indoors to a bright area. Stanley has an ideal location in her great room, which features a southern exposure and has floor-to-ceiling windows. Her prior home, however, didn’t have a bright area, so she put the plants in the basement directly under growlights. 3. Provide humidity. Stanley has a whole house humidifier in her current home that keeps her houseplants happy when forced heat blows. If you don’t have such a setup, mist the plants a couple of times a day, when possible, and put them on humidity trays. These are trays filled with pebbles to which you add water to just below the top of the pebbles. The water evaporates and humidifies the plants. Signs that a plant could use more humidity are dry leaf tips and leaf drop—although some leaf loss is normal after a plant is moved indoors. 4. Water sparingly. “Avoid overwatering your plants in the winter months. Keep in mind that most plants will drink very little at this time of year. Water them when the top one to two inches of soil has dried out, and when you do, give them a moderate amount of water. 5. Delay feeding. Don’t fertilize the plants until a month before you plan to put them back out in spring. For Stanley, this is mid-March, as her last frost date is generally mid-April. She feeds weekly with a half-strength solution of a liquid, all-purpose, organic fertilizer. 6. Transition out. Your houseplants will be ready to go outside again in the spring when you venture outdoors to enjoy the mild weather. Wait until the danger of frost has passed and nighttime temperatures stay above 45 degrees Fahrenheit. When you move your plants outdoors, water them well. In about a month, they’ll be happily growing once again.